Dutch Auction Onchain
What is a Dutch Auction?
A Dutch auction is a unique type of auction where the price of an item starts high and gradually decreases until it reaches the reserved price. Unlike traditional auctions where the price starts low and increases as bidders compete, a Dutch auction operates in the opposite direction. This dynamic pricing mechanism makes Dutch auctions an intriguing and efficient method for buying and selling assets.
An NFT Dutch auction begins with a high starting price, then drops over time at a predetermined rate until a designated price floor is hit or a demand equilibrium is reached, and all the NFTs sell out.
This type of auction encourages buyers to act quickly and make a bid while also allowing collectors to sell their NFTs at higher prices than they might receive in a traditional fixed-price sale.
Selling models with Examples
Here will cover the types of dutch auction with examples
A Dutch auction, also called a descending price auction, is a type of auction in which an auctioneer starts with a very high price, incrementally lowering the price until someone buys an NFT
Dutch Auction for Linear & Exponential Type Selling Models
Ready to create dutch auction listing? Follow the steps below to get started.
Step 1: On this approach, Admin or Collection Owner can set Dutch auction to our smart contract with required parameters for any user to buy via Wallet.
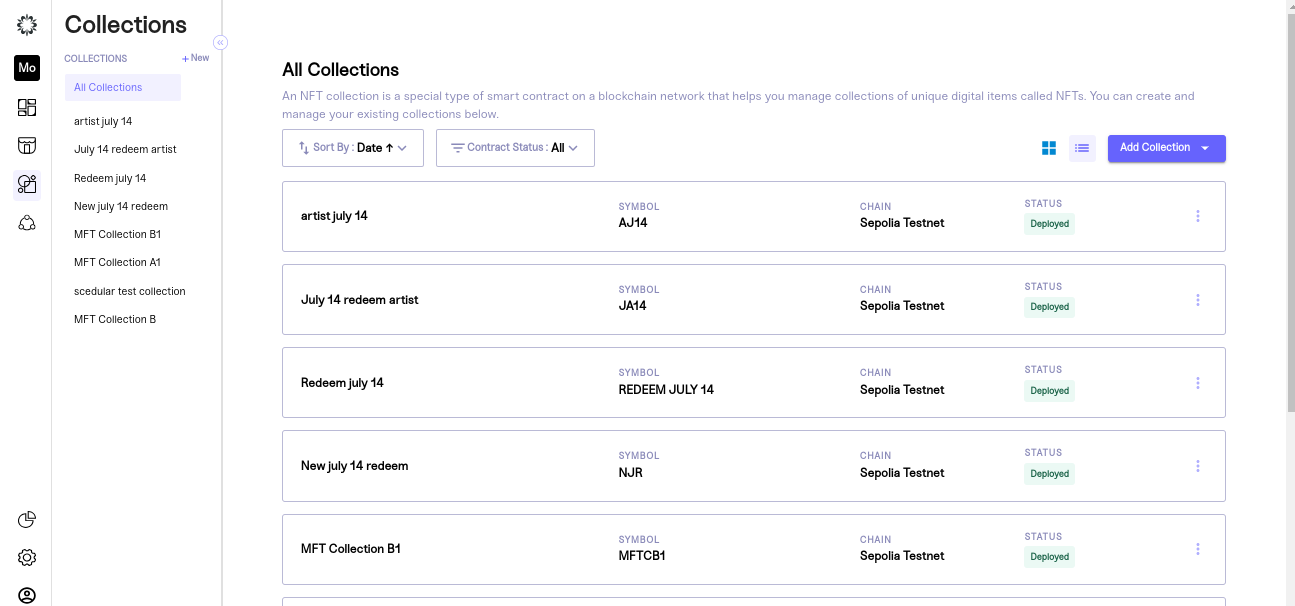
After logging into your organization's dashboard, navigate to the “Collections” tab. Here you can create new Collection, manage or view draft and deployed Collections and edit settings for any collection.
Step 2: Take any collection which is deployed state and redirect to drops and create a drop
To create a drop, click "New Drop". A pop-up will appear asking you to name the drop, pick a sale type, and set its status.
Be sure to choose “Sale” for a paid NFT drop and set the status as inactive so you can work on your draft. Once you are satisfied with your inputs click “continue” to edit your drop details.
Step 3: Set Your Drop Settings
Your drop will be created as a draft and you will be taken to a new screen where your team can customize the settings. These settings include:
- Drop Details: create your customer-facing drop name, description, and sale status.
- Sale Settings: set the time period for the sale and payout address used to receive funds for items sold.
- Sale Limits: limit how many items a customer can mint and spend during your drop.
- Pre-Sale options: choose whether to enable a pre-sale time period and allowlist.
Once you have entered your desired settings, click "Save Settings". You will know that your settings have been successfully saved when you are redirected to the overview of your drop.
Step 4: Navigate to Listings and Add Items to Your Drop
After creating your drop, you can add listing items using our no-code tool. With this step, your team can build a multi-tiered drop that can be a single auction, a single "Buy Now," or Dutch auction.
To get started, click the “add listings” button and wait for the listing settings page to load.
Step 5: Buy Now Setup & Configuration Details
After the page loads, you can start entering the settings for each item you add to your drop. This lets you set different start and end times for each item, and choose Buy now.
To add a listing item to your drop, you need to provide the following information:
Listing Details
Listing allows you to sell a single NFT or a group of NFTs on your platform. A listing can be considered as a higher or lower hierarchy depending on your selling strategy. Drops are at a higher hierarchy level than listings.
- Listing Name
- Description
- Start Date and Time
- End Date and Time
- Thumbnail Image
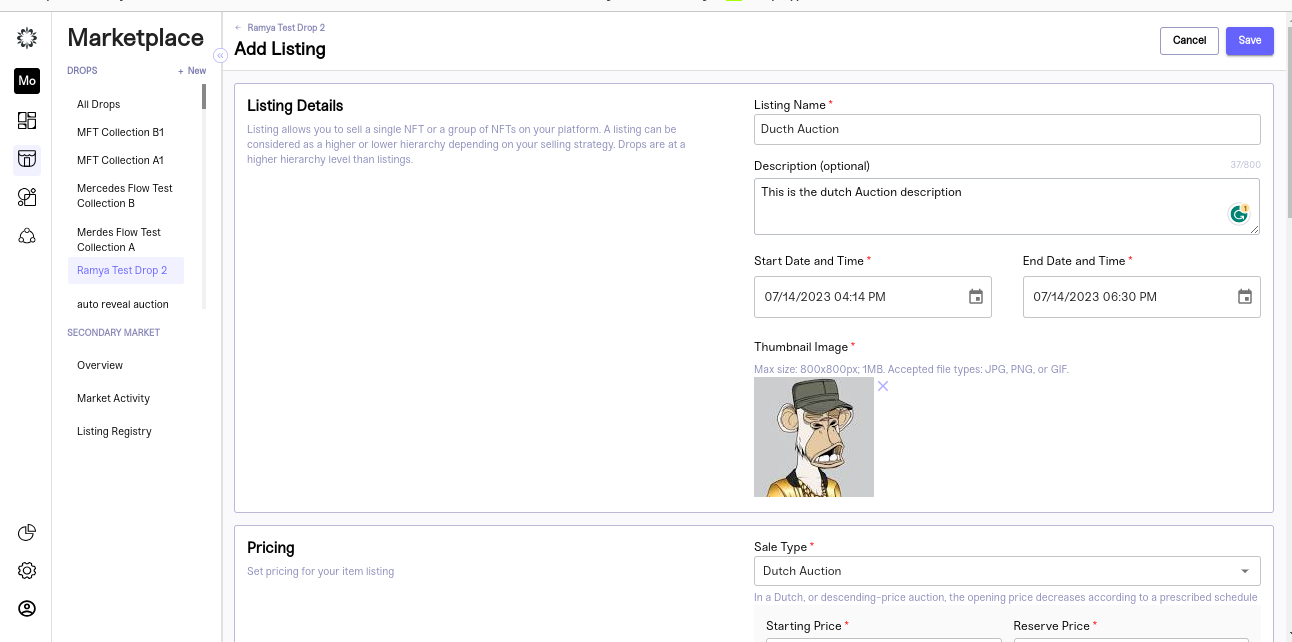
Pricing Details
Set pricing for your item listing
-
Sale Type- Dutch Auction
In a Dutch, or descending-price auction, the opening price decreases according to a prescribed schedule
-
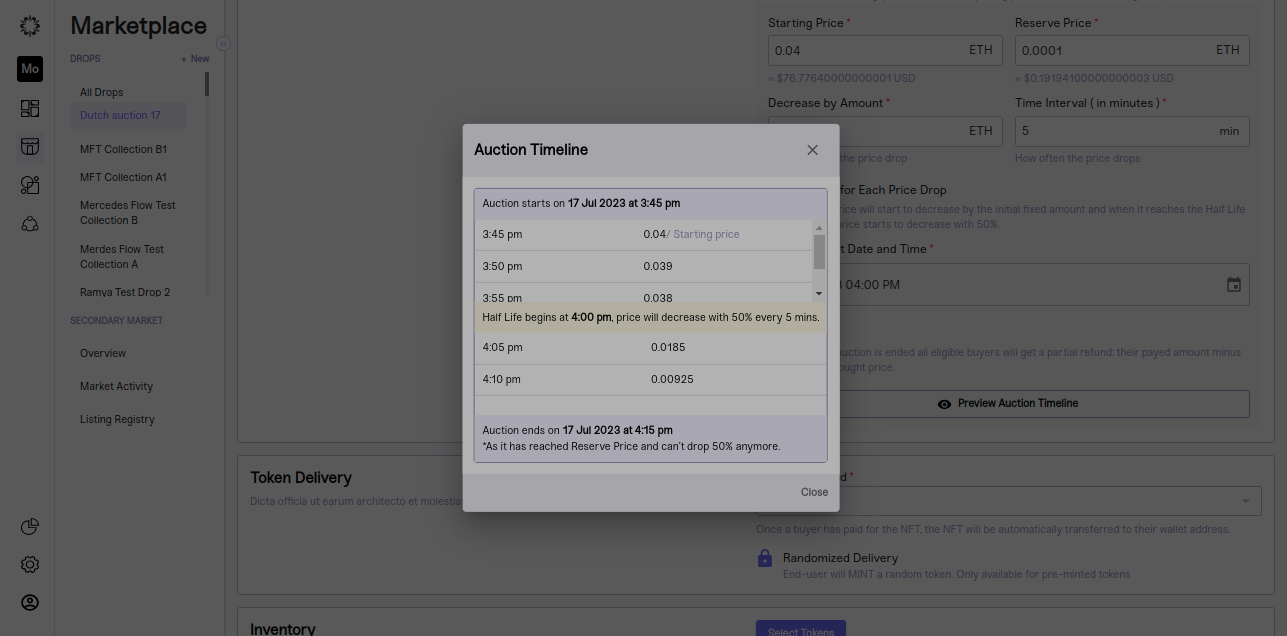
Starting Price
Starting price is the maximum value price, which further extends the auction by decreasing the amount. Starting price is the initialization of the auction. The NFT is expected to be purchased more than the start price.
- Reserve Price
The reserved price is the fixed price that is reserved. The reserved price is said to be the set price in the buying process. At Dutch auctions, the reserved price is first set to a particular amount. This amount is considered to be more privileged because the buying price should not be reduced below this amount.
-
Decrease by Amount/Reducing Price
The Reduced price is the constant price at which the price is reduced from the starting price in a regular time interval. This amount is set during the Dutch auction setup which can’t be altered after the Dutch auction gets started.
-
Time Interval ( in minutes )
Time interval indicates How often the price drops. You can set the time for
-
Half Life for Each Price Drop
The Half-life price is the constant price at which the price is reduced by 50% from the starting price in a regular time interval. The reduction starts to happen automatically during the Dutch auction when it reaches the half-life time set during the Dutch auction configuration.
-
Rebates
After the auction is ended all eligible buyers will get a partial refund: their payed amount minus the final bought price.
- Preview Auction Timeline
It will show the amount reduction details based on given time and price.
Token Delivery
Once a buyer has paid for the NFT, the NFT will be automatically transferred to their wallet address based on token delivery method choosen
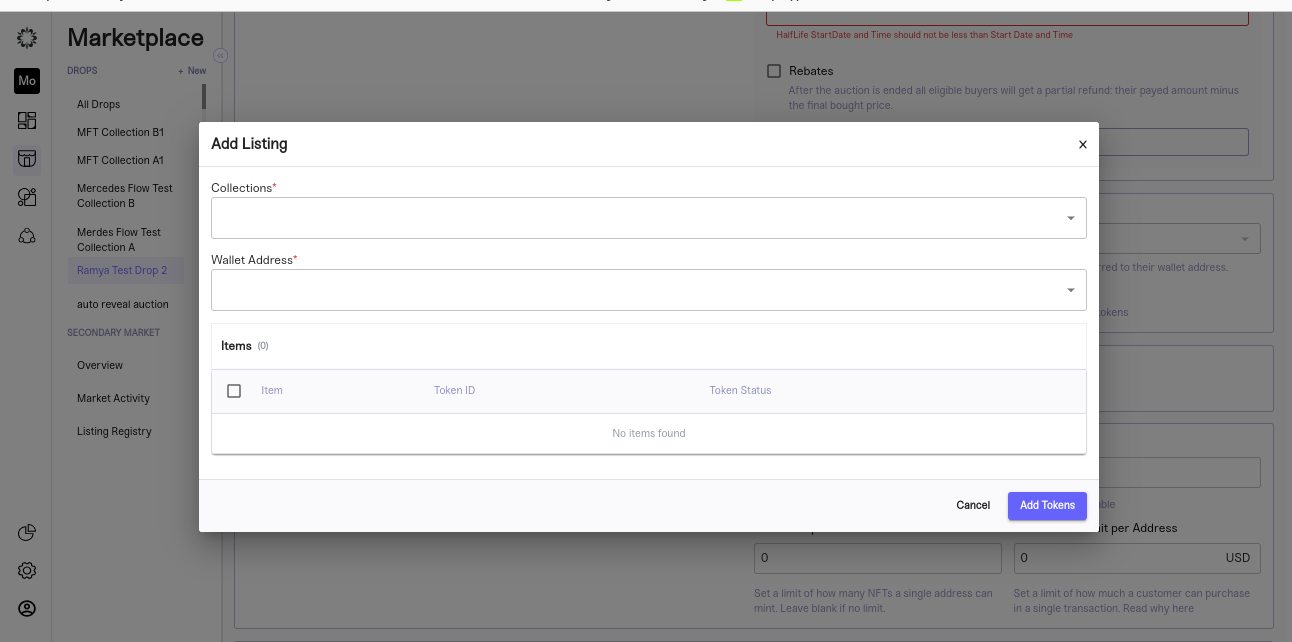
Inventory
Select your tokens for the listing
You can select the tokens from inventory section. All the available collections you can see here
Quantity & Sale Limits
Set limits to how many NFTs a buyer can mint and purchase or limit the monetary value of their transaction
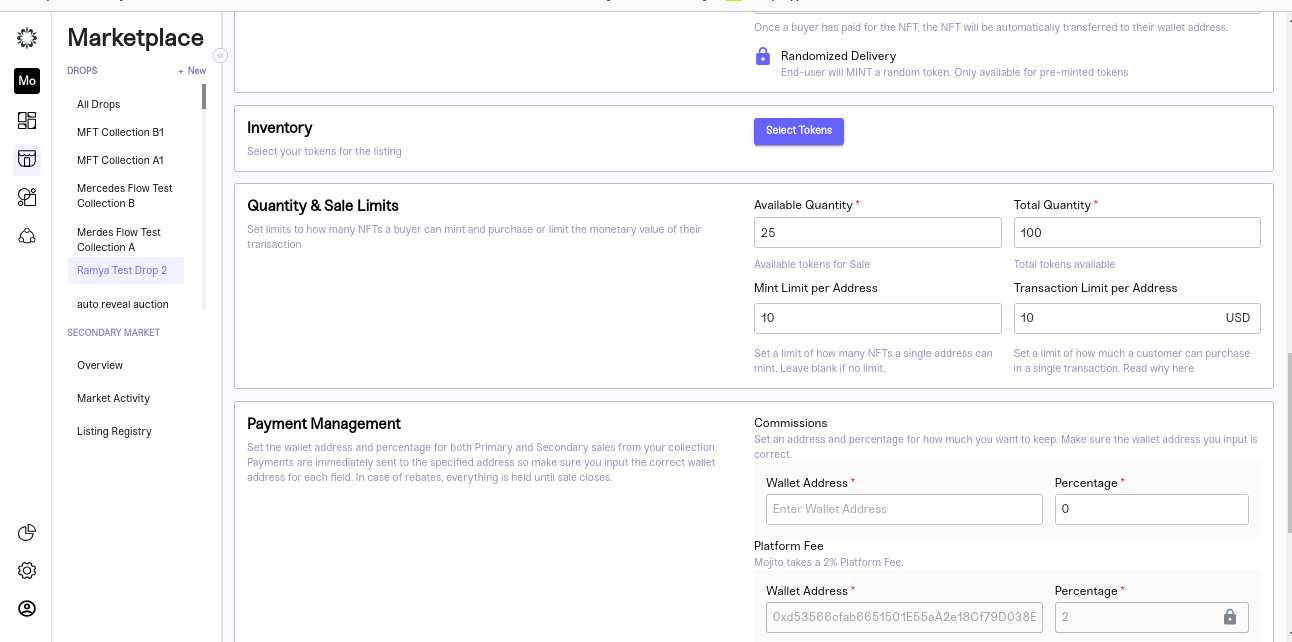
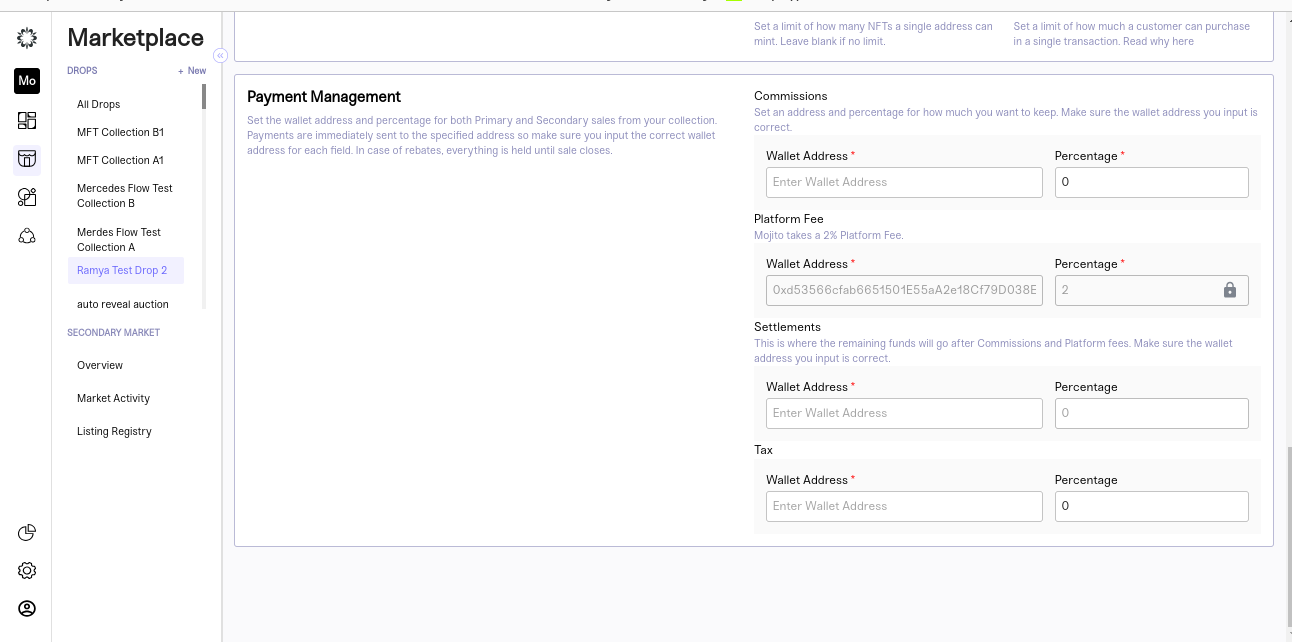
Payment Management
Set the wallet address and percentage for both Primary and Secondary sales from your collection. Payments are immediately sent to the specified address so make sure you input the correct wallet address for each field. In case of rebates, everything is held until sale closes.
Step 6: Review and Save
It's essential to review your settings to ensure everything is correct and your drop is executed with no hiccups.
To review the drop, follow these steps:
- Review your listing details and token delivery settings to ensure they are correct.
- Review your overview and drop settings to ensure they are correct.
Once you are satisfied with your inputs, go to your Listing settings and change your sale status to active. This will ensure your sale is executed according to your inputs and your community can purchase their favourite items.
Step 7: Edit listing
Once dutch auction created,we can able to edit the details until auction starts.Once auction started we can able to edit only the end date and reserve price.
Step 8: Auction End
Once the auction gets ended, these are the following functionality to have happened
- If the ending price reaches the reserved price, the reserved price is set for all the users who buy throughout the auction.
- If the ending price is above the reserved price, the ending price is set for all the users who buy throughout the auction.
- Once the auction ends, the remaining price which is the rebate paid by the users during the buying process needs to be refunded
- Needs to show the list of tokens sold at which price and the history of buying by the users
Step 9: NFT Distribution
NFT can be purchased by any number of users against the collection with a wallet limitation set during the Dutch auction configuration. Two possible scenarios for NFT delivery -
- NFT can be delivered once the user buys and the amount gets transferred to the auction address.
- NFT can be delivered to all the users who buy throughout the auction after the Dutch auction duration gets completed. It can be delivered in two ways i.e,
- NFT can be claimed by the user after the auction ends
- NFT can be delivered by the admin to all the users who bought during the auction
Step 10: Rebates
The rebate will be released once the auction gets ended, two possible scenarios are happening for Rebate functionality
- Balance Amount will be delivered when the customer himself claims or the admin calls the release function, the amount will be delivered to the mentioned wallet address
- Or else the ReleaseAll function will be triggered by the admin in order to deliver the balance amount to all the purchased customers who paid more than the last bought price.
Step 11: Overview
Our all-in-one activity dashboard offers a centralized hub that empowers brands to effortlessly view and analyze relevant data for their sales events. Our streamlined approach eliminates the need to navigate through multiple platforms or sift through complex spreadsheets, providing brands with everything they need in one place for efficient management of their sales events. With our dashboard, brands can confidently make data-driven decisions and maximize their sales potential.
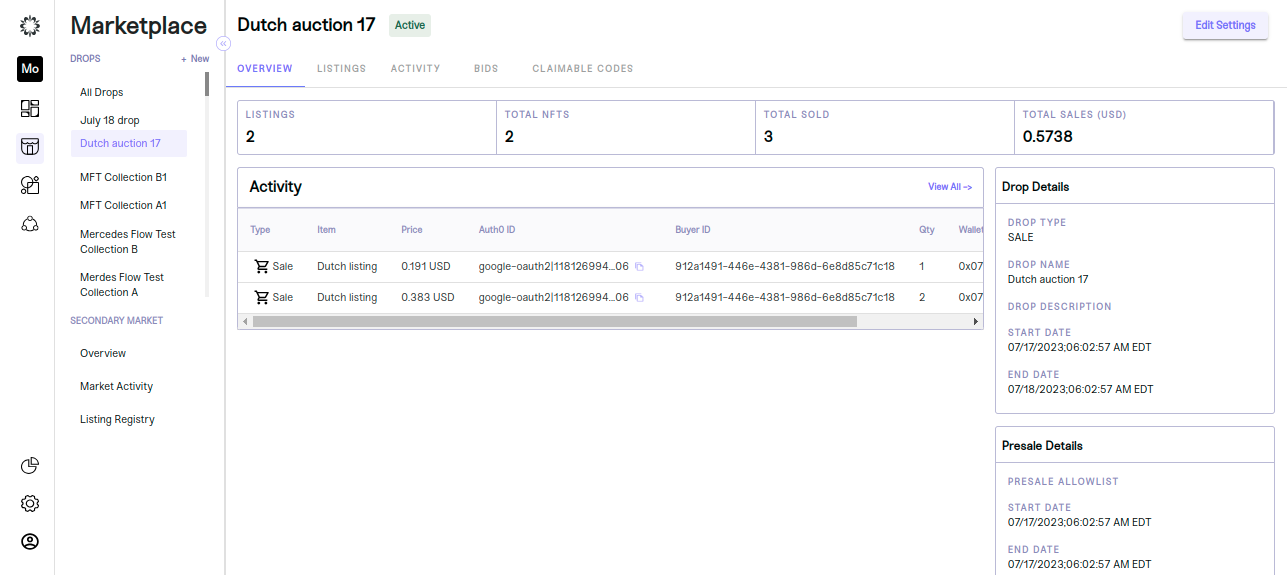
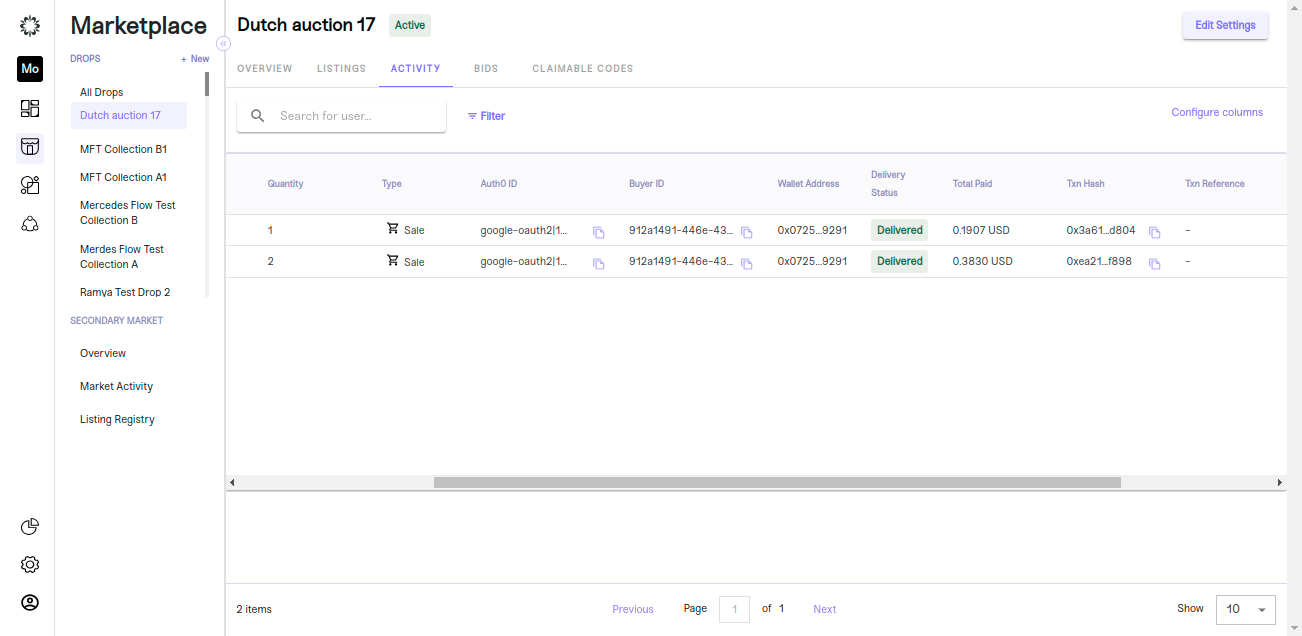
Step 12:Activity
An overview of the drop will appear and you will see details about “Listings, total NFTs available, total NFTs sold, and total revenue in USD. To view your Buy Now , click on the “Activity” tab located at the top of the overview page.
This will open all activity details for the Buy Now related to the drop in question. You can choose to customize the way information is displayed by clicking on the "Configure Columns" text located above the dashboard.
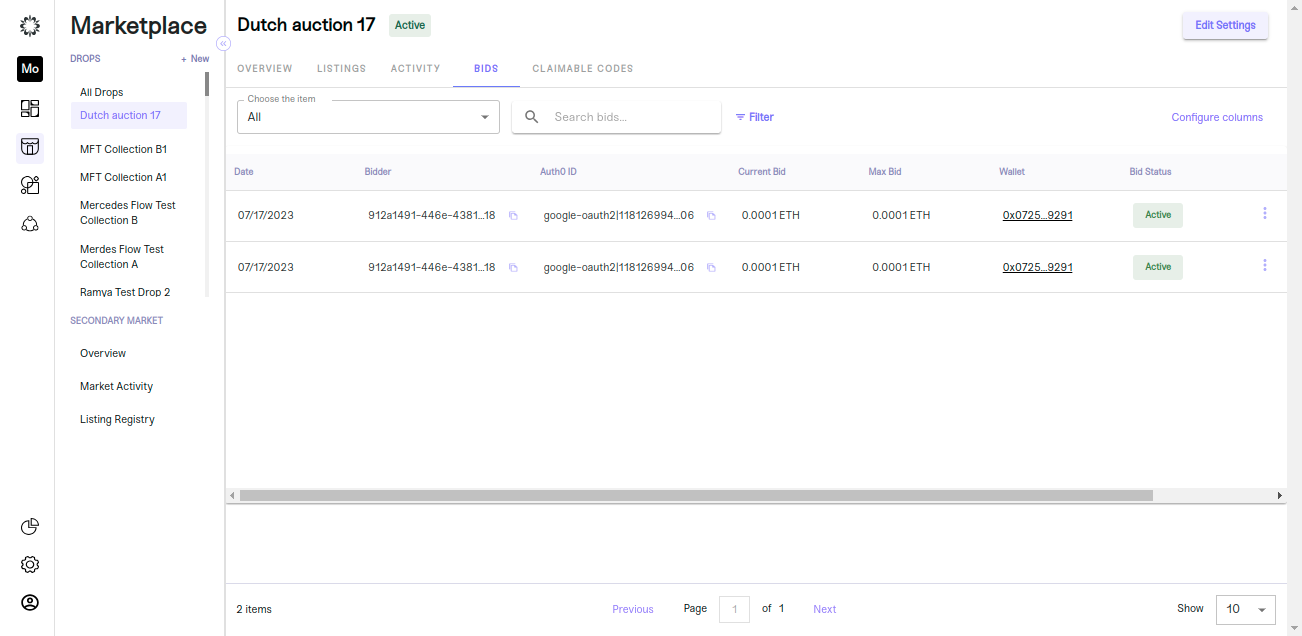
Step 13:Bids
Look for the "Bid Activity" tab located at the top of the overview page. Click on it to access the bid activity associated with the selected drop. After you will be taken to the bid activity section where you can view information such as auth0 IDs, bid amounts, timestamps, and any additional details relevant to the bidding process.
Congratulations!
That's it! You've successfully created a Buy now listing for your drops using our no-code NFT tool. Our platform offers advanced customization options, including the ability to determine price, restrict audience availability, and define sale time parameters.
Keep in mind that the success of your drop depends on how well you market it, so consider promoting your drop on social media, email newsletters, and other channels to reach a wider audience.
Steps Involved in Auction API
- getMarketplaceAuctionLot API fetch specific auction lot information, which includes details about the auction, such as the starting price, reserve price, and bidding history.
- getRebaseStatus API retrieves information about whether a specific auction is eligible for claiming and the time frame in which it can be claimed
- getDutchAuctionPurchaseInfo API verifies whether your wallet address is logged in and returns the required information for purchasing the NFT through Dutch auction.
- getMyInvoices API is to retrieve the purchase history of a user, which includes all the purchases they have made in the past.
- ConfirmDutchAuctionBid API needs to be called once an NFT has been purchased from the blockchain. Based of this mojito creates an purchase history for an user.
- confirmDutchAuctionRebate is used to update the claim performed by the user on the Onchain Dutch Auction. Once the claim is completed on the blockchain from the client application, this mutation needs to be called. Upon calling, Mojito creates a rebate history for the user.
- confirmDutchAuctionEnd Once the auction date and time are completed and the transaction is completed on the blockchain, this mutation needs to be called so that Mojito can update all the operations required post-end auction sale.
Updated about 1 year ago