Setup via Mojito Admin
Setting Up a Drop
Step 1: Navigate to Your Marketplace
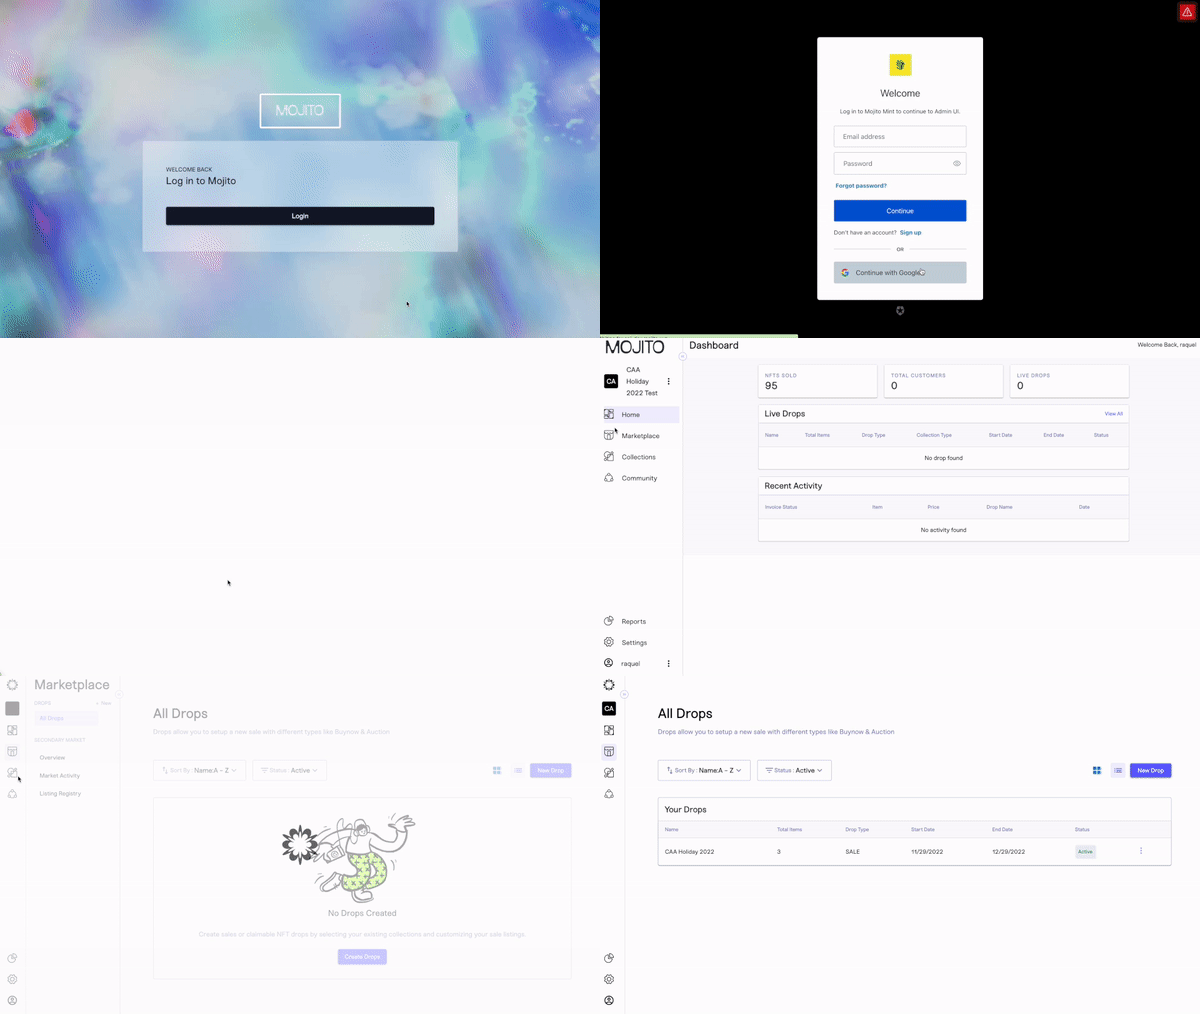
After logging into your organization's dashboard, navigate to the “Marketplace” tab. Here you can create new drops, manage or view drafts and deployed drops, and edit listing items in your drop.
Step 2: Create a New Drop
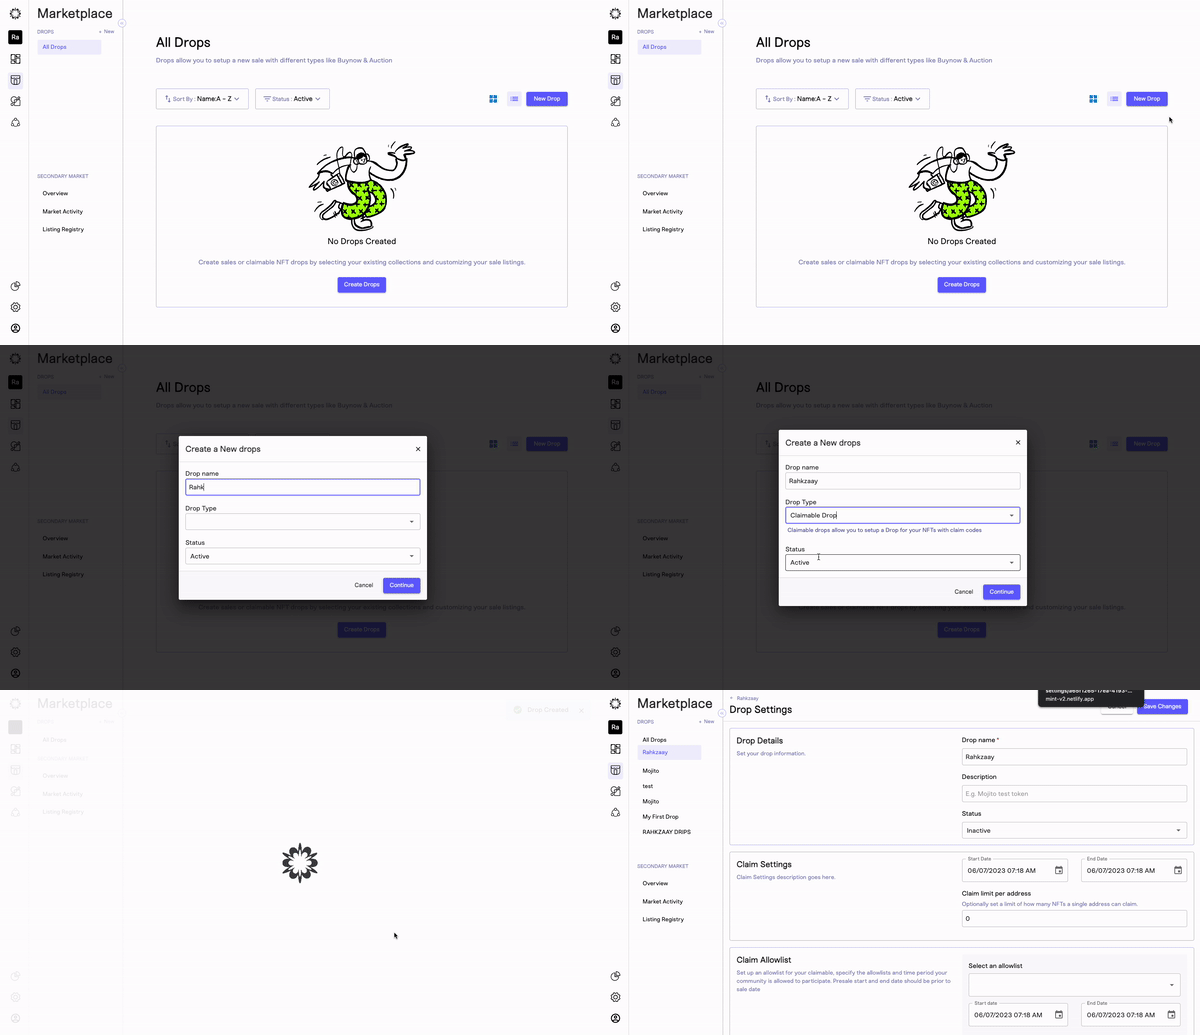
To create a drop, click "New Drop". A pop-up will appear asking you to name the drop, pick a sale type, and set its status.
Be sure to choose “Claimable” for an earned NFT drop and set the status as inactive so you can work on your draft. Once you are satisfied with your inputs click “Continue” to edit your drop details.
*Pro Tip: Claimable Drops speak to the action of the end user earning the NFT for your drop. Ultimately Claimable and Earned NFT mean the same thing.*
Step 3: Set Your Drop Settings
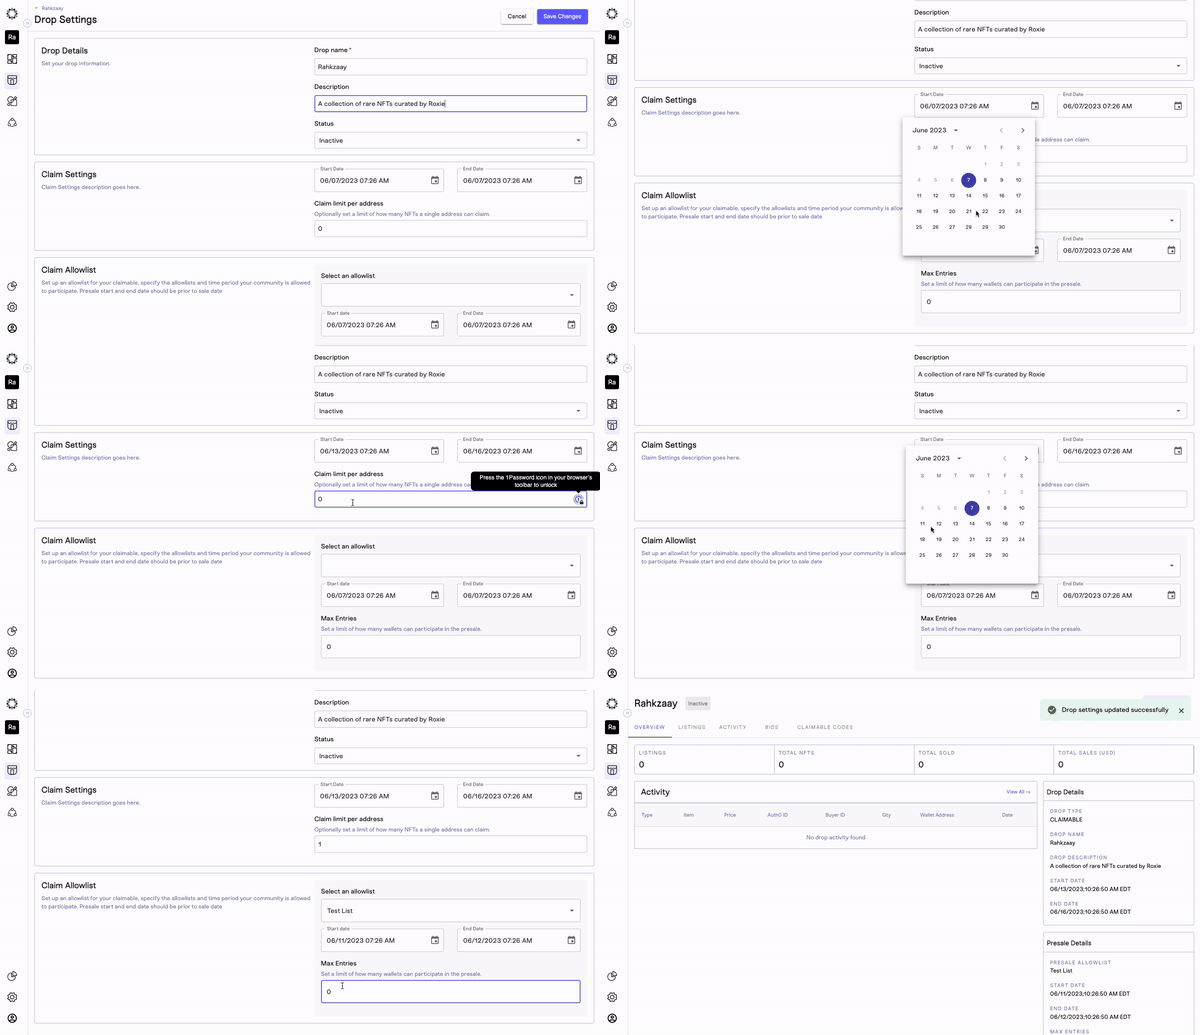
Each drop will be created as a draft, even if you accidentally set it to active. Once the drop is created you will be taken to a new screen where your team can customize the settings. These settings include:
- Drop Details: decide your customer-facing drop name, description, and sale status.
- Claim Settings: set the time period for the sale and how many items each wallet address can Mint.
- Claim Allowlist: choose whether to enable a pre-sale time period and allowlist.
Once you have entered your desired settings, click "Save Settings". You will know that your settings have been successfully saved when you are redirected to the overview of your drop.
Step 4: Navigate to Listings and Add Items to Your Drop
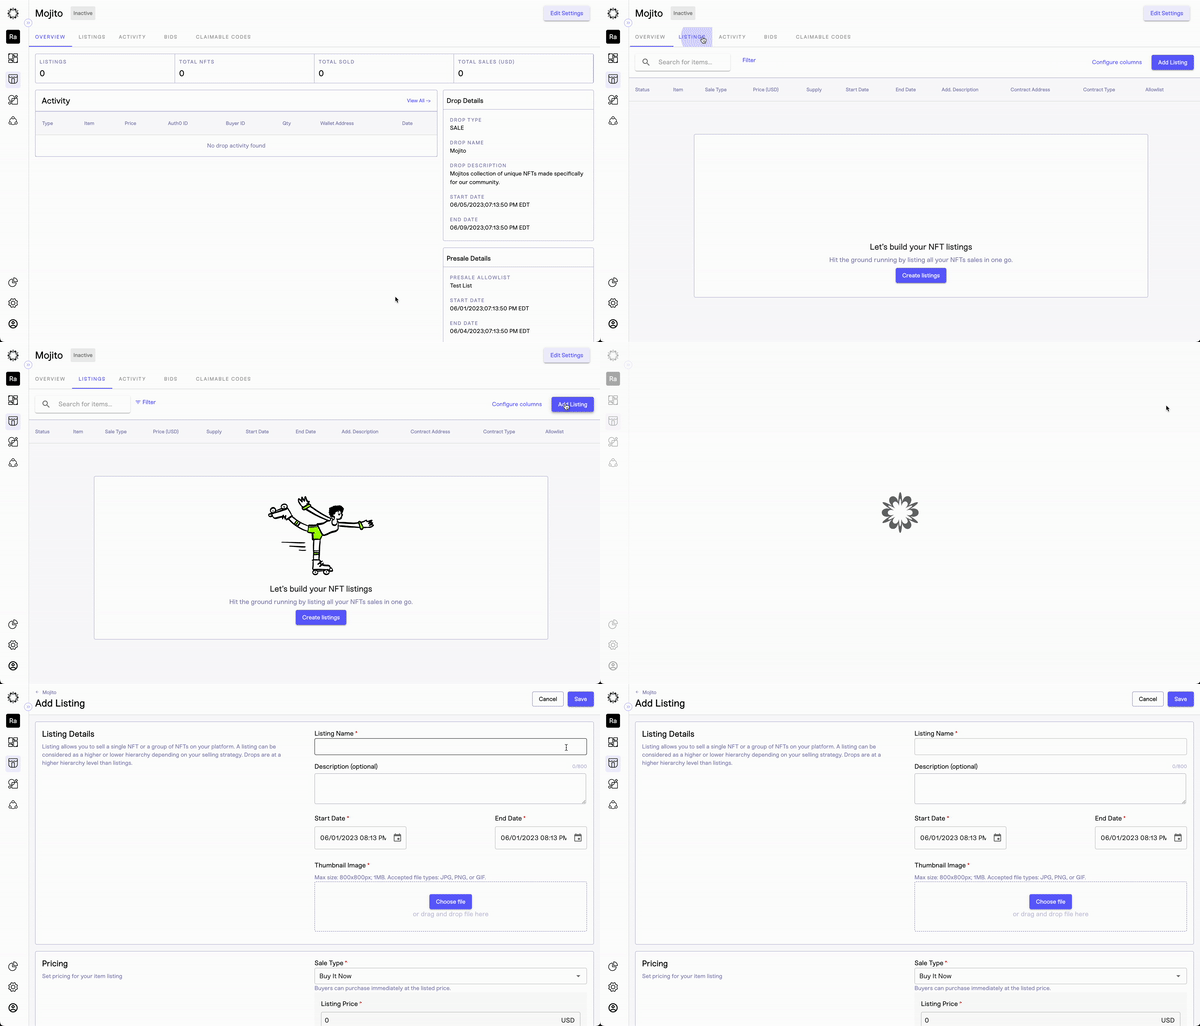
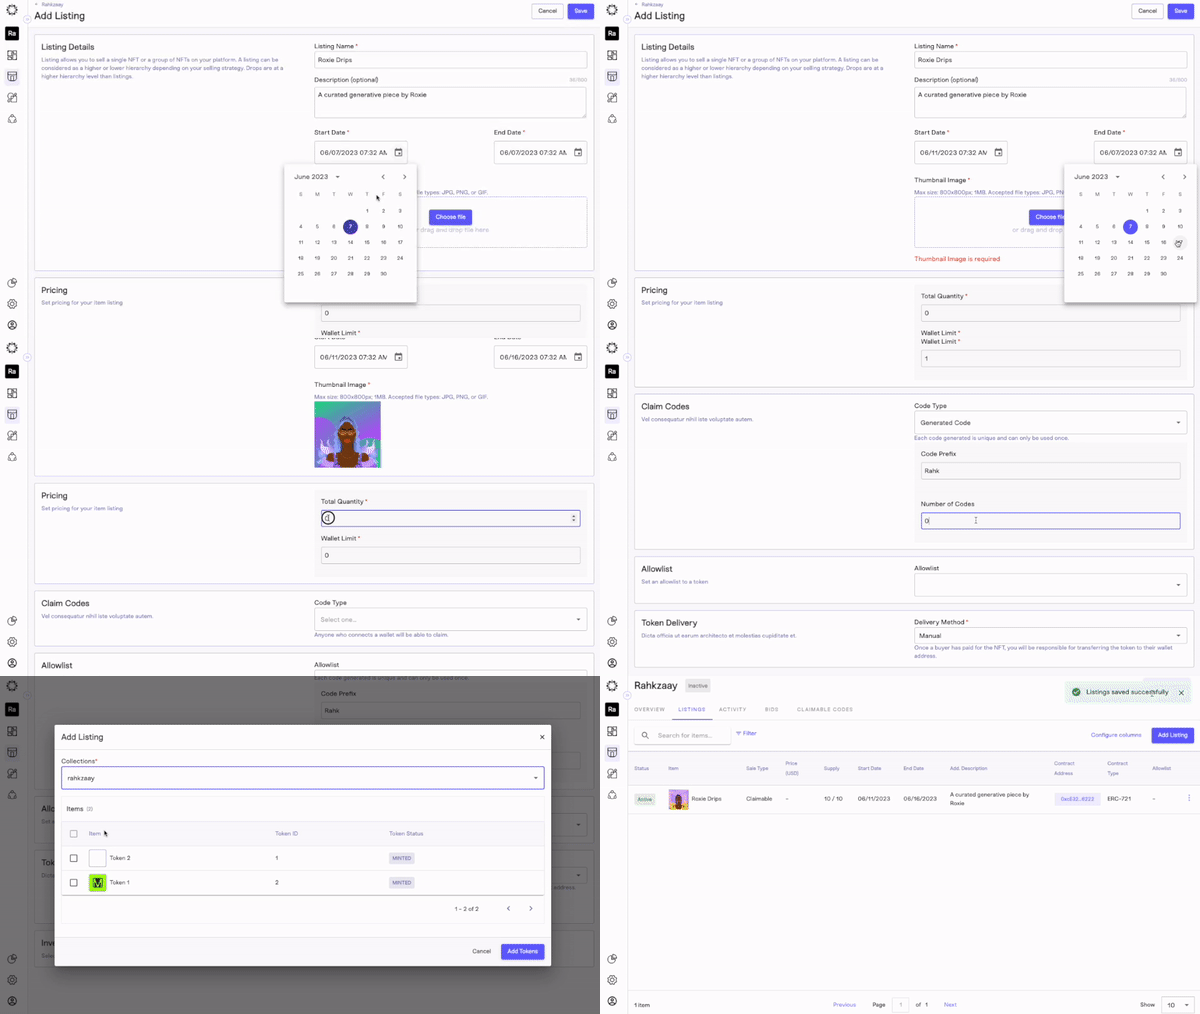
After creating your drop, you can add listing items using our no-code tool. With this step, your team can build a multi-tiered drop.
To get started, click the “add listings” button and wait for the listing settings page to load.
Step 5: Add Listing and Edit Settings… and Repeat
After the page loads, you can start entering the settings for each item you add to your drop. This step allows you to attach multiple items to the claim code so users can choose their item.
To add a listing item to your drop, you need to provide the following information:
- Listing name, description, thumbnail image, and sale start and end time.
- Pricing details: Since Claimable drops are free, you’ll only pick the amount available for each listing and set restrictions around how many items a user can claim.
- Claim Codes: here you will decide what kind of claim code generation you’d like to implement for each drop. (scroll to the top if you’d like to review the different claim types)
- Decide whether to use an allowlist per listing.
- Choose whether to deliver your tokens manually or automatically after the sale.
Repeat step 5, depending on how many items you want to add to your drop.
Step 6: Review and Publish
It's essential to review your settings to ensure everything is correct and your drop is executed with no hiccups.
To review the drop, follow these steps:
- Review your listing details and token delivery settings to ensure they are correct.
- Review your overview and drop settings to ensure they are correct.
Once you are satisfied with your inputs, go to your drop settings and change your sale status to active. This will ensure your sale is executed according to your inputs and your community can purchase their favorite items.
Congratulations!
That's it! You've successfully created a drop for your collection using our no-code NFT tool. Our platform offers advanced customization options, including the ability to determine price, restrict audience availability, and define sale time parameters.
Keep in mind that the success of your drop depends on how well you market it, so consider promoting your drop on social media, email newsletters, and other channels to reach a wider audience.
Updated 8 months ago
