AllowList
Community Allowlist
TL;DR: This user guide provides a comprehensive overview of our allowlist feature while discussing some benefits of allowlists for big brands. We also discuss the different types of allowlists types, including manual and dynamic methods.
Allowlists have become a prevalent practice within the Web3 community for project drops. These lists offer a range of exclusive benefits to participants, giving them early access to sales and events and a competitive advantage in the dynamic world of Web3.
To join an allowlist, individuals can sign up early or complete specific qualifying tasks. The benefits of being on the allowlist extend beyond mere privilege. It helps mitigate gas fee spikes, fosters deeper adoption among the core community, and generates early interest prior to the public sale.
The Power of Mojito’s Allowlist Feature
With the rapid growth of the NFT ecosystem, controlling user access has become increasingly important for brands. The allowlist feature empowers you to manage and regulate user participation, offering a range of benefits for your brand and community.
- Community Engagement: The allowlist feature allows big brands to create a sense of exclusivity and foster a strong community around their NFT offerings. By selectively granting access to specific community members, such as loyal customers, brand advocates, or influencers, brands can encourage active participation, collaboration, and a sense of belonging.
- Brand Ambassadors: The allowlist feature allows big brands to identify and empower their most dedicated community members as brand ambassadors. By granting them the ability to mint and distribute NFTs associated with the brand, the brand can leverage its influence and reach to promote the NFT collection and engage a wider audience. This helps amplify the brand's message, increase brand awareness, and attract new customers or collectors.
- Quality Control: Implementing an allowlist for community members can ensure a seamless and enjoyable minting experience for dedicated fans of big brands. The allowlist feature helps manage traffic to the mint page and reduces associated gas costs during public launches. This ensures a smoother experience for community members, allowing them to easily access and participate in minting NFTs without overwhelming the platform or incurring high transaction fees.
- User-Generated Content: The allowlist feature empowers community members to actively contribute to the brand's NFT ecosystem by creating and sharing their own NFTs. This user-generated content adds diversity and creativity to the brand's NFT collection, attracting different perspectives and styles. It also fosters a sense of co-creation and collaboration between the brand and its community, strengthening the bond and fostering a vibrant ecosystem around the brand's NFTs.
- Rewarding Community Loyalty: By granting exclusive access to mint NFTs, big brands can reward their most loyal community members. This can take the form of special edition NFTs, limited-time releases, or other incentives that are only available to those on the allowlist. By offering these exclusive rewards, brands can show appreciation for their community's support, encourage ongoing engagement, and drive brand loyalty.
Overall, the allowlist feature for community members enables big brands to foster a strong and engaged community, maintain quality control, leverage brand ambassadors, encourage user-generated content, reward community loyalty, and mitigate risks. It creates a mutually beneficial relationship between the brand and its community, driving brand advocacy, authenticity, and growth in the NFT space.
Benefits of Allowlist
We created this feature to offer your brand a range of valuable benefits designed to elevate your web3 presence. Selectively granting access to drops launched by your team creates a sense of exclusivity that piques the interest of potential customers and generates valuable word-of-mouth marketing. Community members, enthused by their exclusive experiences, naturally become brand advocates, spreading the word and expanding your brand's reach.
In addition, you can use the allowlist to segment your brand's highly-engaged customers, providing an excellent opportunity for targeted marketing campaigns. Personalize your messaging, promotions, and content to cater to this group, increasing the likelihood of conversion and customer retention. Analyze their behavior, preferences, and purchasing patterns to refine your marketing strategies, tailor offerings, and make data-driven decisions for even better results.
Furthermore, our community allowlist feature is a powerful tool designed to increase the lifetime value of your brand. By providing privileged access to your most engaged customers, you can cultivate a deep sense of loyalty that translates into repeat purchases, ultimately driving up revenue and profitability. Granting exclusive access to drops for allowlist members ensures a smooth and seamless user experience. These users are pre-qualified and ready to participate, minimizing potential friction or bottlenecks during the launch process. This streamlined experience enhances customer satisfaction and reinforces positive brand interactions. This sustained customer loyalty becomes a solid foundation for the long-term success of your web3 strategy.
Types of AllowList
There are different ways to create an allowlist, depending on your brand's specific requirements. Here are the various methods your team can use to create an allowlist in Mojito Admin:
Manual Allowlist:
With our manual allowlist approach, you have the flexibility to manage and update the allowlist based on your preferences:
Learn more about creating a manual allowlist below!
How to Create a Manual Allowlist
Web3 Functionality
- Add Digital Wallet Addresses: Manually add wallet addresses to the allowlist to allow specific users to access your product or service.
- Remove Wallet Addresses: If needed, you can remove wallet addresses from the allowlist to revoke access for certain users.
- Search: Utilize the search functionality to filter wallet addresses based on wallet address.
- Add Wallets from Search: After performing a search, you can add selected wallets from the search results directly to the allowlist.
Web2
- This option provides the same functionality as the one above but uses a different identifier to allow access to your community members.
- You can manage the allowlist by uploading your community's web2 identifier, also known as the Auth0 ID.
Dynamic Allowlist
The dynamic allowlist approach automates the process of adding and removing wallet addresses based on predefined rules. This method ensures that the allowlist remains up-to-date without requiring manual intervention.
Learn more about creating a dynamic allowlist below!
How to Create a Dynamic Allowlist
Set Rules: Define specific rules based on criteria such as the number of tokens owned, contract address, token IDs, or date range of ownership. These rules determine which wallet addresses are automatically added or removed from the allowlist.
We made our tool to give your brand the optionality needed to choose the most suitable allowlist creation method. Whether manual or dynamic, you can effectively manage and control access to your product or service, ensuring a seamless experience for your community members.
How to Create a Manual Allowlist
With the allowlist feature, you can easily create a list of approved users who have exclusive access to participate in your upcoming drops. This feature provides an added layer of security to your brand's marketplace activities, ensuring that only trusted individuals have access to your most exclusive offerings.
The allowlist feature can also help you engage more deeply with your community members. They will feel valued and respected as exclusive members of your brand's community. The allowlist feature allows you to tailor your marketing efforts to this exclusive group, providing them with a personalized experience.
Creating a Manual Allowlist
Now that you understand the power of the allowlist feature, let's dive into the user guide. Here, we will walk you through the steps of setting up and managing your allowlist. We will provide you with the tools and knowledge to create a manual allowlist in minutes.
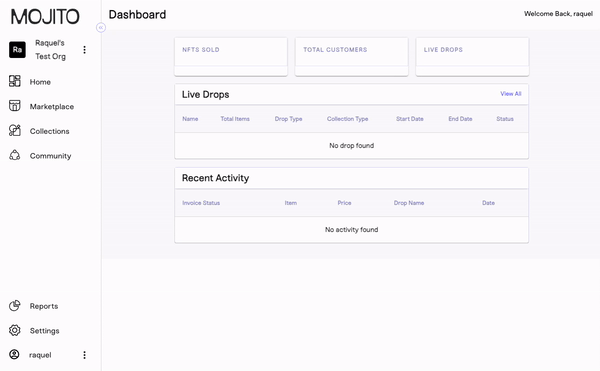
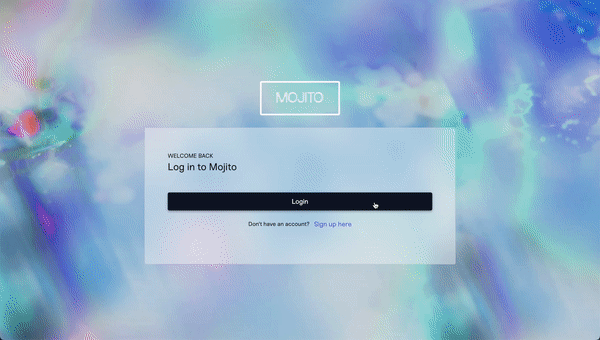
Step 1: Log In to Mojito Admin
To begin, log in to your Mojito Admin Dashboard using your assigned admin credentials. Once the dashboard loads and you see the first two letters of your organization displayed in the top right corner of the screen, you're ready to start.

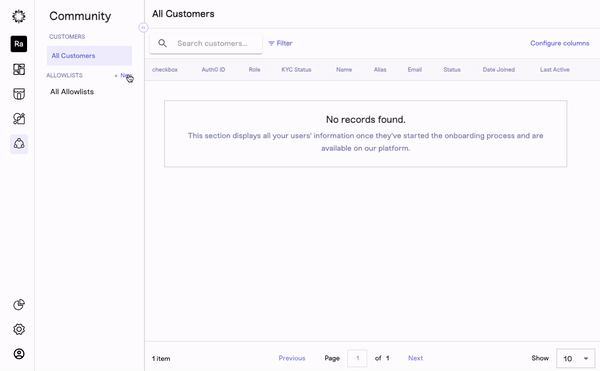
Step 2: Click the "Community" Tab
Navigate to the community tab to access our allowlist feature.
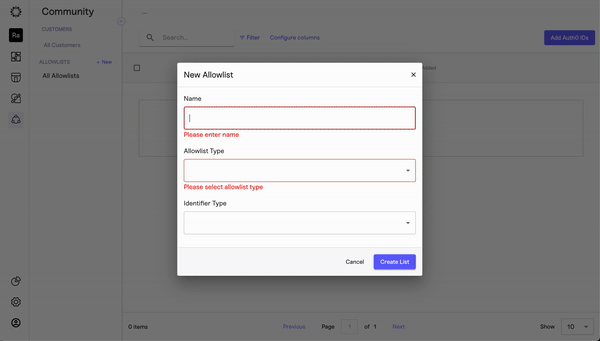
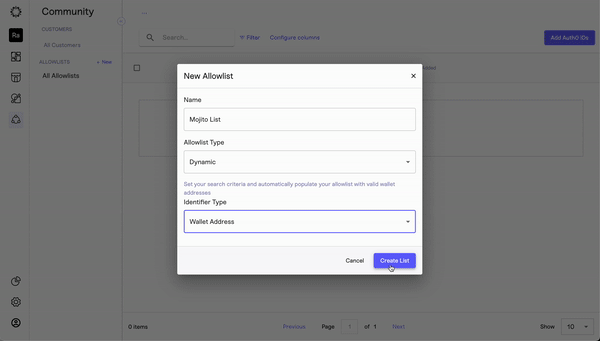
Step 3: Click "+ New" to Add a New Allowlist
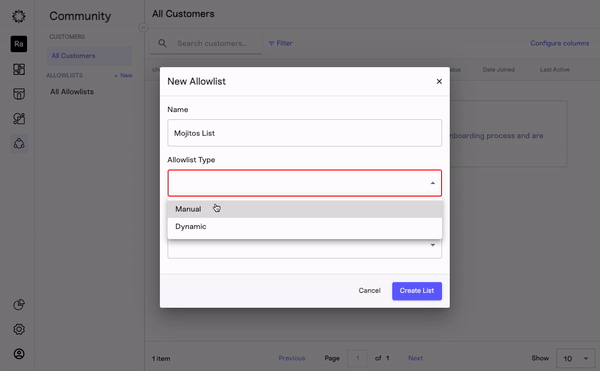
Once the community page loads, click the “+ New” button to bring up the form and begin creating your allowlist. Here you can determine your allowlist name and type.
For this guide, we will be creating a manual allowlist so please pick the manual allowlist type.
Step 4: Pick the Allowlist Identifier
Choose the identifier your team would like to use in order to give your community members exclusive access. Here you have the option to let customers access your drop via their wallet address or auth0 ID.
Once you are satisfied with your inputs, click the "Create List" button to continue on with the creation process.
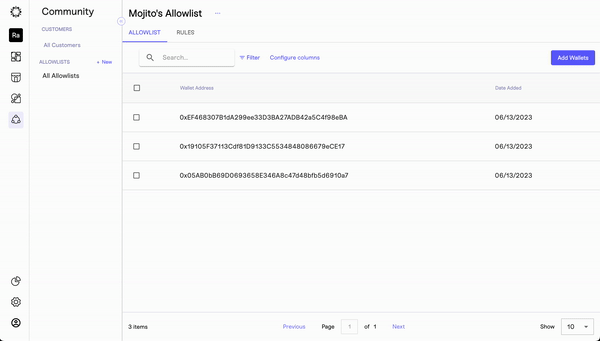
Step 5: Add Wallet Address or Auth0
To add an identifier, click the "Add Wallets" or "Add Auth0" button. This will prompt a pop-up where you can enter the auth0 or wallet address for the members you wish to add to the allowlist. If you have multiple wallets to add, simply click the "Add Another" button.
Once you have entered all the necessary information, click "Add to List".
Step 6: Connect the Allowlist to a Drop
Success! You have now created an allowlist and can attach it to your next drop.
To add an allowlist to your next drop, follow the guide relevant to your drop type below.
How to Setup Paid NFT Drop in Mojito Admin
How to Setup Earned NFT Drop in Mojito Admin
How to Create a Dynamic Allowlist
With the allowlist feature, you can easily create a list of approved users who have exclusive access to participate in your upcoming drops. This feature provides an added layer of security to your brand's marketplace activities, ensuring that only trusted individuals have access to your most exclusive offerings.
The allowlist feature can also help you engage more deeply with your community members. They will feel valued and respected as exclusive members of your brand's community. The allowlist feature allows you to tailor your marketing efforts to this exclusive group, providing them with a personalized experience.
Creating a Dynamic Allowlist
Ready to create your dynamic allowlist for your next drop? Follow the steps below and begin using the allowlist to enhance your engagement strategy!
Step 1: Log In to Mojito Admin
To begin, log in to your Mojito Admin Dashboard using your assigned admin credentials. Once the dashboard loads and you see the first two letters of your organization displayed in the top right corner of the screen, you're ready to start.
Step 2: Click the "Community" Tab
Navigate to the community tab to access our allowlist feature.

Step 3: Click "+ New" to Add a New Allowlist
Once the community page loads, click the “+ New” button located next to the allowlist subcategory to bring up the form and begin creating your allowlist. Here you can determine your allowlist name and type.
For this guide, we will be creating a dynamic allowlist so please pick the dynamic allowlist type.
Step 4: Pick the Allowlist Identifier
Choose the identifier your team would like to use in order to give your community members exclusive access. Here you have the option to let customers access your drop via their wallet address or auth0 ID.
Once you are satisfied with your inputs, click the "Create List" button to continue on with the creation process.
Step 5: Enter Inputs
You can now input the rules you'd like to apply to your dynamic allowlist. Decide whether to allow wallet addresses or auth0 IDs that own NFTs from a collection of your choice. Once you're satisfied with your set dynamic rules, click "Save Settings" in the top right corner of the screen.
Step 6: Connect the Allowlist to a Drop
Success! You have now created an allowlist and can attach it to your next drop.
To add an allowlist to your next drop, follow the guide relevant to your drop type below.
Updated about 1 year ago