Redeem Setup Via Mojito Admin
How to Create a Redeemable Collection?
With zero code required, our platform offers a user-friendly interface for you to effortlessly create, customize, and manage your NFT collections. Simply upload your tokens to be minted to your collection after you deploy the contract. The process is intuitive and straightforward, allowing your brand to focus on what you do best: creating extraordinary content to engage your most dedicated fans.
⚠️ Please ensure that your organization already has a wallet connected to it. This wallet will be used to deploy the contract for your collection. Visit our guide to learn more if you still need a wallet.
Follow the guide below to learn more about collection and token creation.
Collection Creation Options
With our no-code tool, big brands have two distinct ways to create or register their collections:
Upload and Mint a New Collection
Mojito makes it easy to upload common file types that represent artwork, media, or unique digital items that make up your web3 collection. These assets can be in various formats, including images, videos, audio files, or even 3D models. Our intuitive interface allows your brand to organize and categorize its assets easily, add relevant metadata, set royalty percentages, and determine provenance for any new collection built using Mojito.
Register an Existing Collection
If your brand has already minted its collections but wants to take advantage of the capabilities of our tools, simply register the collection. Brands can provide necessary information about their collection, such as the contract address, collection name, creator details, and other relevant metadata to begin launching your drop. Our tool seamlessly integrates this information into our platform, allowing you to manage and monitor your existing collections with ease.
Getting Started
We offer a wide range of options for big brands to consider, ensuring each drop is unique and distinct. To create a seamless experience, it's important for your team to consider the token type, sale type, and minting supply in advance.
Review our introductory guide on minting to prepare your collection details below.
Creating a Internal Collection With Redeemables
Mojito simplifies the process of creating collections and minting tokens to remove the complexities typically associated with web3. We ensure your team can concentrate on its core expertise while expanding your digital presence. Whether you want to showcase limited edition fashion collaboration, exclusive digital artwork, gamified loyalty programs, or unique virtual merchandise, our tool provides an easy and efficient solution for big brands to participate in the NFT revolution.
Step 1: Sign into Mojito Admin and Navigate to the Collections Tab
Login to your Mojito Admin Dashboard using your assigned admin credentials to get started and navigate to the collections tab located on the main navigation bar to the left of the screen.
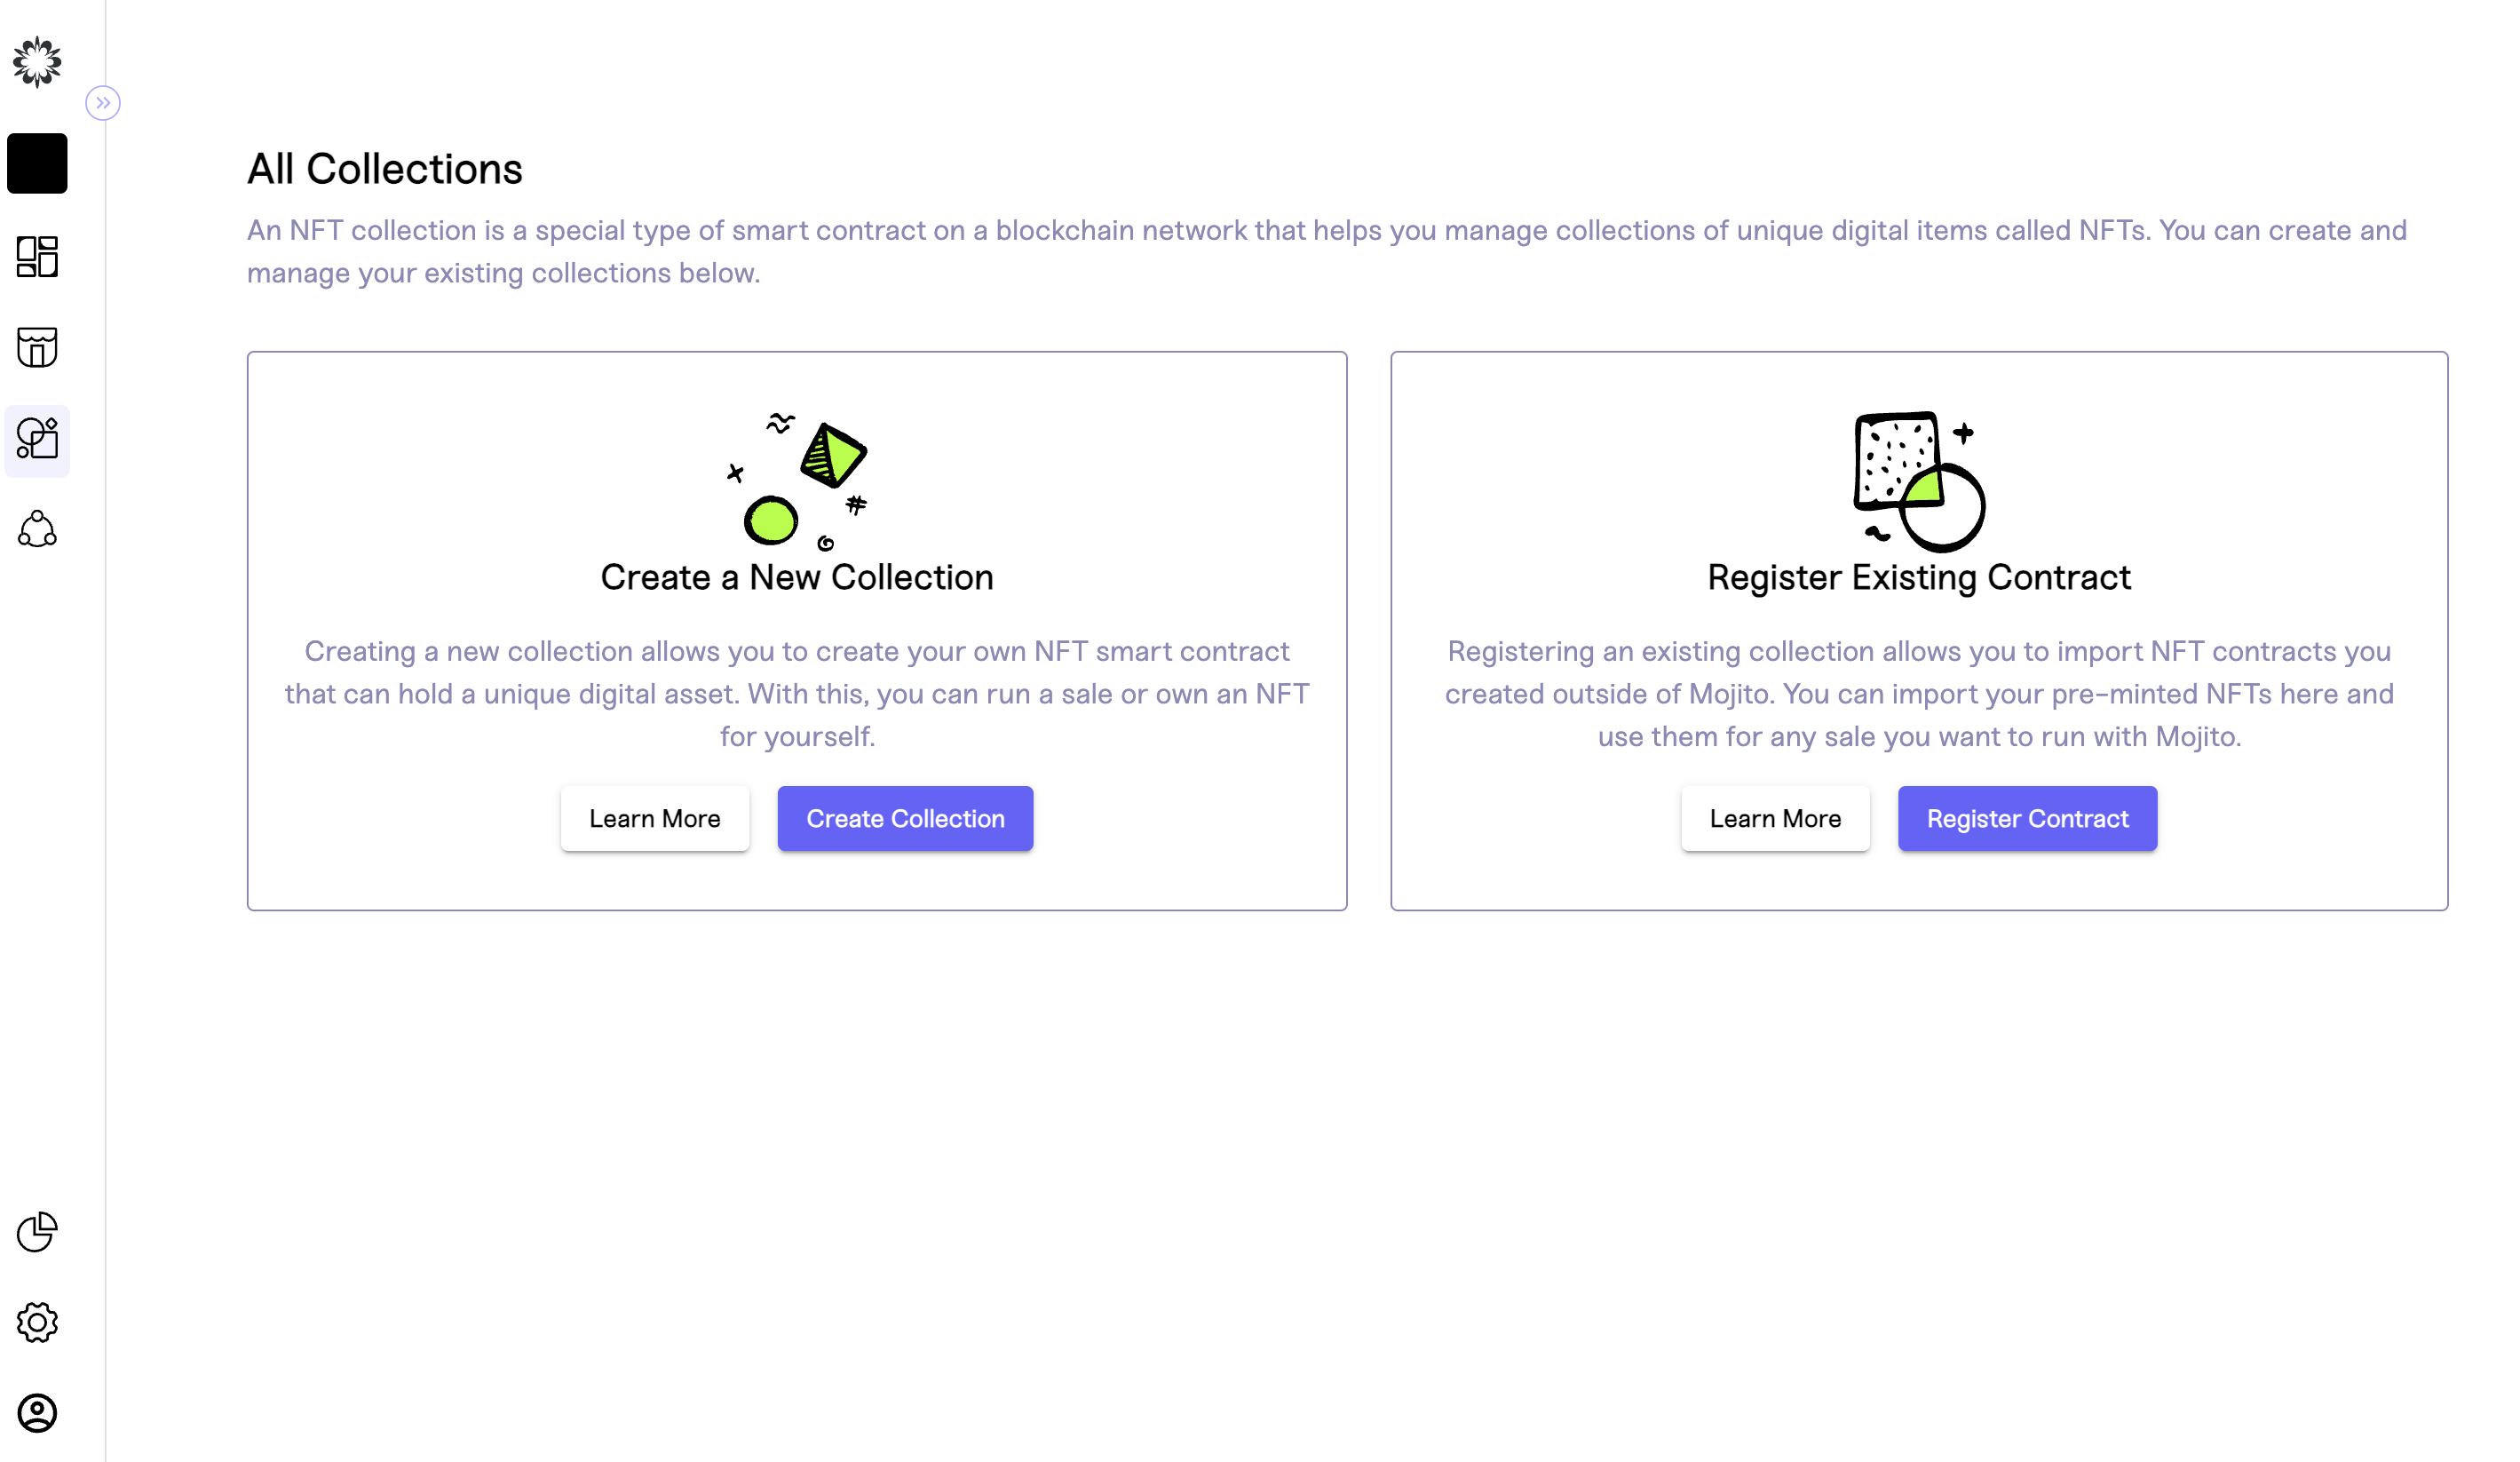
Step 2: Click Create Collection
In this guide, we focus on how to create a collection from scratch but remember you always have the option to import items minted elsewhere.
To get started creating your collection click the "Create Collection" button. A pop-up will appear asking you to enter collection details, including the name of the collection, the symbol for the contract, and the network for the collection to live on, alongside choosing the collection and contract type.
Once you are satisfied with your inputs click “Continue” to create your collection draft.
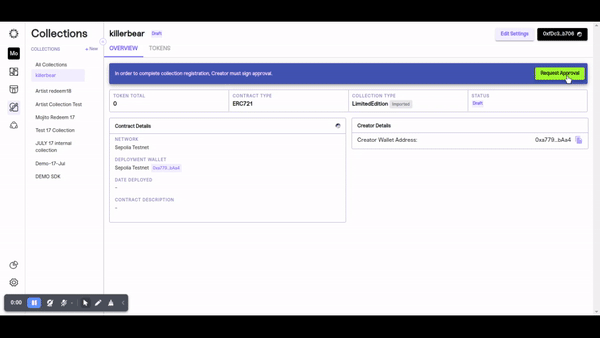
Step 3: Finalize Your Draft Collection Settings By selecting Redeemables and sent Request Approval
Every collection you create is initially saved as a draft to ensure you can make any updates needed before going live. This means you must edit the collection's settings to finalize the collection and contract details.
In this step, you will pick the collection's description, set provenance by picking a branded wallet to Artist details, determine the minting method, set royalties, and decide if the NFTs will be redeemable assets.
Remember you have the option to set for multiple wallets to accept and distribute royalties so every collaborator gets paid for their efforts using our royalty splitter functionality.

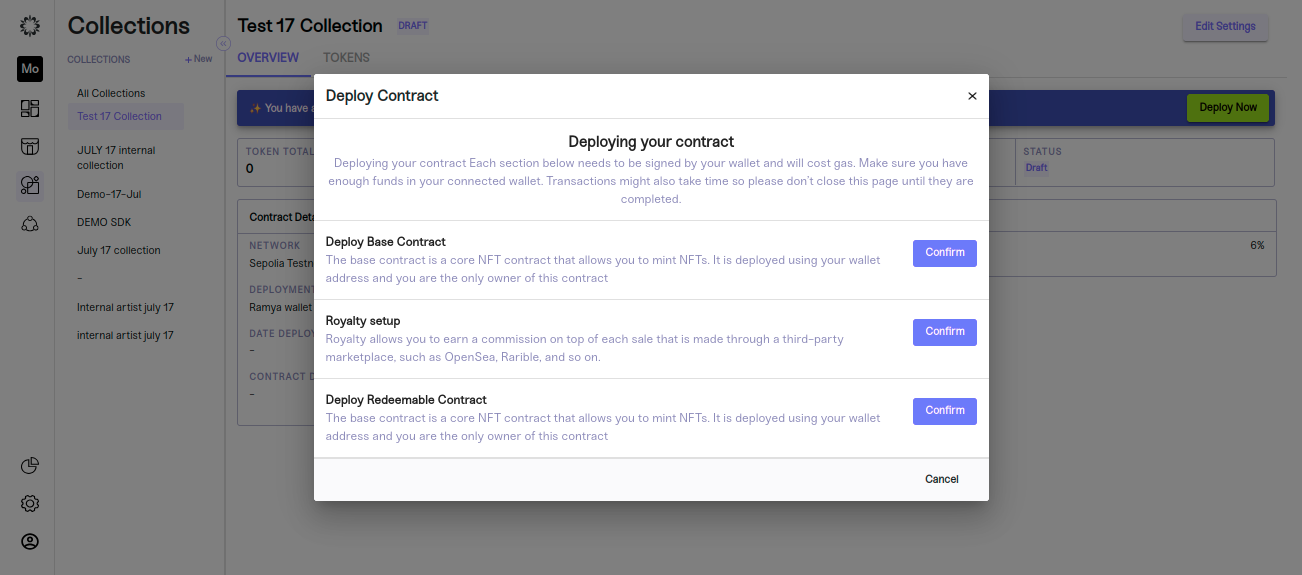
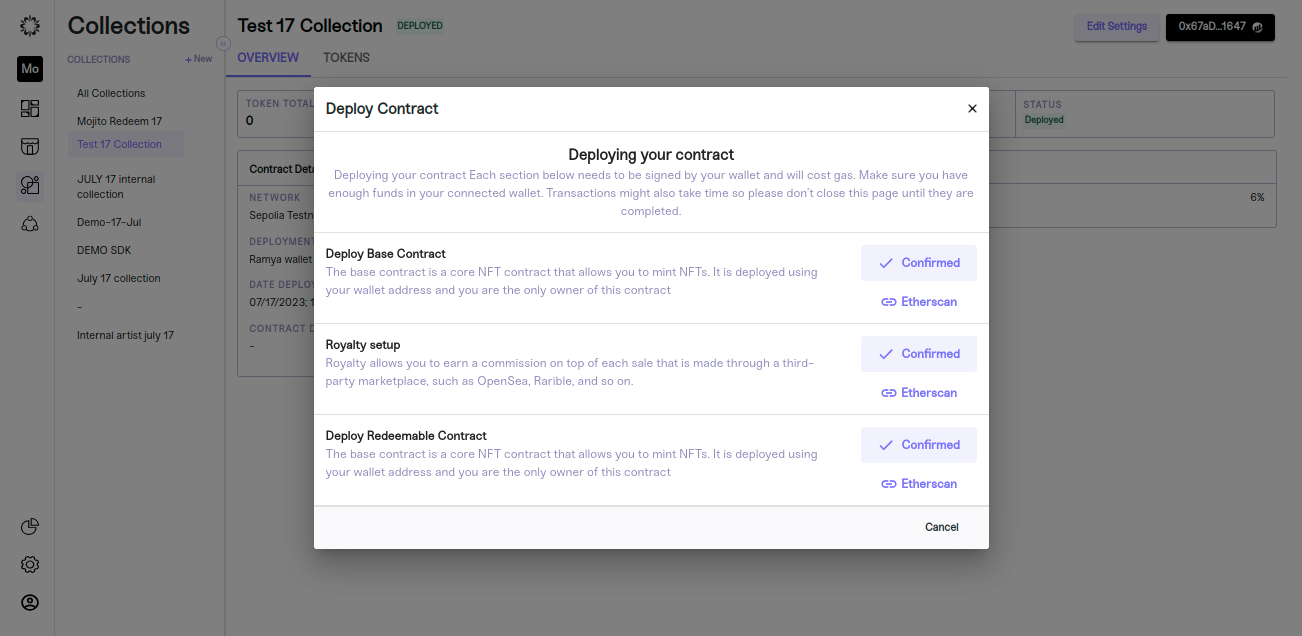
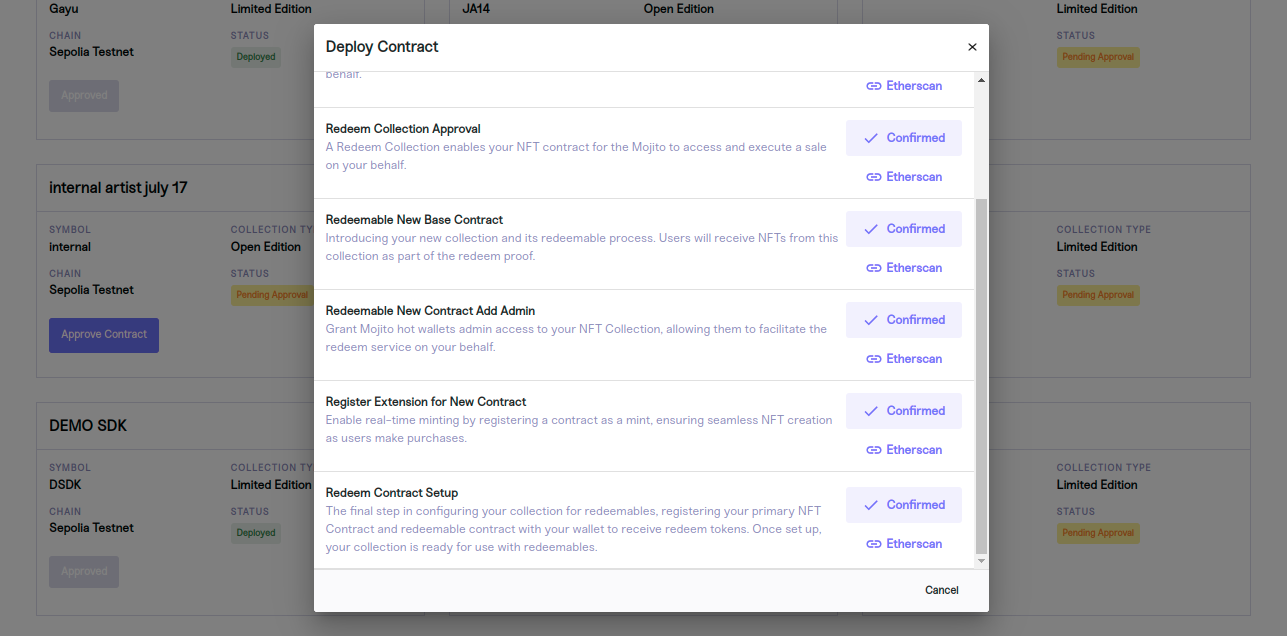
Step 4: Deploy the Collection
Now it is time to deploy the smart contract associated with your draft collection. This deployment process brings your collection to life and makes it accessible to users. Once the collection is deployed it can’t be reverted since the blockchain is immutable so please be sure to review all details to ensure they accurately reflect your team's requirements.
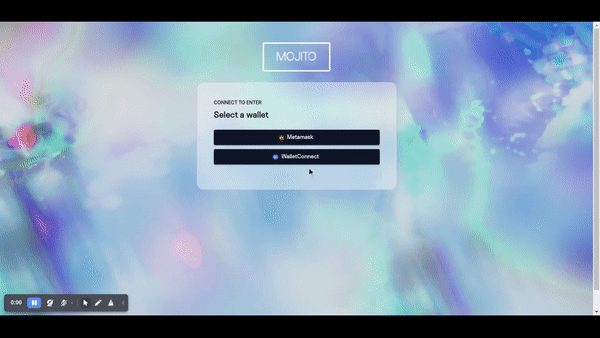
If the collection was set up to be deployed from an artist's wallet, they will receive an email that asks them to connect their wallet and deploy the contract from anywhere in the world.
🛑Also, double-check your organization has enough gas to cover the fees required for deploying the contract and setting royalties.
Before Deployment:
After Deployment:
Step 5: Add and Mint Tokens to Your Deployed Collection
Now that you have successfully deployed your contract, you are ready to add tokens to your collection! You can easily add tokens to your collection by clicking the "Add Tokens" button and beginning to customize your NFTs' attributes, including metadata, images, and descriptions.
Next, review your token details for accuracy, save, and refresh the page. After the page refreshes and loads, click "Mint" to finalize your token creation. You will receive a confirmation upon successful minting.
Success!
Congratulations! You have successfully created your internal redeem collection using our powerful no-code tool. Creating collections is an enjoyable and thrilling process that enables you to showcase your unique digital assets. Now you can effortlessly create collections, allowing your customers to appreciate your one-of-a-kind creations and grow your web3 strategy.
Creating a Artist Collection With Redeemables
Step 1: Sign into Mojito Admin and Navigate to the Collections Tab
Login to your Mojito Admin Dashboard using your assigned admin credentials to get started and navigate to the collections tab located on the main navigation bar to the left of the screen.
Step 2: Click Create Collection
In this guide, we focus on how to create a collection from scratch but remember you always have the option to import items minted elsewhere.
To get started creating your collection click the "Create Collection" button. A pop-up will appear asking you to enter collection details, including the name of the collection, the symbol for the contract, and the network for the collection to live on, alongside choosing the collection and contract type.
Once you are satisfied with your inputs click “Continue” to create your collection draft.
Step 3: Finalize Your Draft Collection Settings By selecting Artist and Redeemables
Every collection you create is initially saved as a draft to ensure you can make any updates needed before going live. This means you must edit the collection's settings to finalize the collection and contract details.
In this step, you will pick the collection's description, set provenance by picking a branded wallet to deploy the contract, determine the minting method, set royalties, and decide if the NFTs will be redeemable assets.
Remember you have the option to set for multiple wallets to accept and distribute royalties so every collaborator gets paid for their efforts using our royalty splitter functionality.
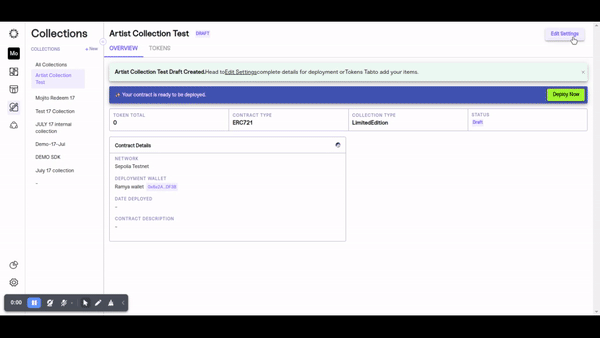
Step 4: Deploy the Collection
Now it is time to deploy the smart contract associated with your draft collection. This deployment process brings your collection to life and makes it accessible to users. Once the collection is deployed it can’t be reverted since the blockchain is immutable so please be sure to review all details to ensure they accurately reflect your team's requirements.
If the collection was set up to be deployed from an artist's wallet, they will receive an email that asks them to connect their wallet and deploy the contract from anywhere in the world.
🛑Also, double-check your organization has enough gas to cover the fees required for deploying the contract and setting royalties.
Before Deployment:

After Deployment:
Step 5: Add and Mint Tokens to Your Deployed Collection
Now that you have successfully deployed your contract, you are ready to add tokens to your collection! You can easily add tokens to your collection by clicking the "Add Tokens" button and beginning to customize your NFTs' attributes, including metadata, images, and descriptions.
Next, review your token details for accuracy, save, and refresh the page. After the page refreshes and loads, click "Mint" to finalize your token creation. You will receive a confirmation upon successful minting.
Success!
Congratulations! You have successfully created your artist collection using our powerful no-code tool. Creating collections is an enjoyable and thrilling process that enables you to showcase your unique digital assets. Now you can effortlessly create collections, allowing your customers to appreciate your one-of-a-kind creations and grow your web3 strategy.
Creating a import Collection With Redeemables
Step 1: Sign into Mojito Admin and Navigate to the Collections Tab
Login to your Mojito Admin Dashboard using your assigned admin credentials to get started and navigate to the collections tab located on the main navigation bar to the left of the screen.
Step 2: Create Register Contract
In this guide, we focus on how to create a collection from scratch but remember you always have the option to import items minted elsewhere.
To get started creating your collection click the "Register Contract" button. A pop-up will appear asking you to enter collection details, including the contract address,Network,Token id,Contract Type,Creater's Wallet Address,Creater's Email Address .
Once you are satisfied with your inputs click “Continue” to create your collection draft.
Step 3: Finalize Your Draft Collection Settings By selecting Redeemables
Every collection you create is initially saved as a draft to ensure you can make any updates needed before going live. This means you must edit the collection's settings to finalize the collection and contract details.
In this step, you will pick the collection's description, set provenance by picking a branded wallet to deploy the contract, determine the minting method, set royalties, and decide if the NFTs will be redeemable assets.
Remember you have the option to set for multiple wallets to accept and distribute royalties so every collaborator gets paid for their efforts using our royalty splitter functionality.
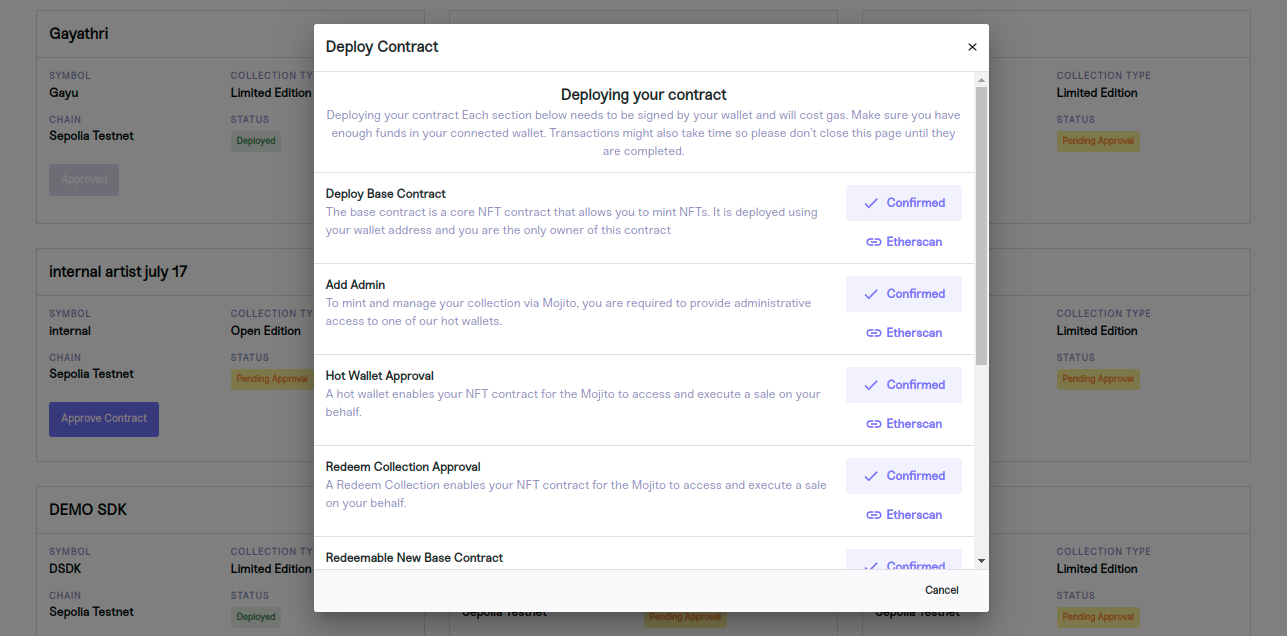
Step 4: Deploy the Collection
Now it is time to deploy the smart contract associated with your draft collection. This deployment process brings your collection to life and makes it accessible to users. Once the collection is deployed it can’t be reverted since the blockchain is immutable so please be sure to review all details to ensure they accurately reflect your team's requirements.
If the collection was set up to be deployed from an artist's wallet, they will receive an email that asks them to connect their wallet and deploy the contract from anywhere in the world.
🛑Also, double-check your organization has enough gas to cover the fees required for deploying the contract and setting royalties.
Before Deployment:
After Deployment:
Step 5: Add and Mint Tokens to Your Deployed Collection
Now that you have successfully deployed your contract, you are ready to add tokens to your collection! You can easily add tokens to your collection by clicking the "Add Tokens" button and beginning to customize your NFTs' attributes, including metadata, images, and descriptions.
Next, review your token details for accuracy, save, and refresh the page. After the page refreshes and loads, click "Mint" to finalize your token creation. You will receive a confirmation upon successful minting.
Success!
Congratulations! You have successfully created your artist import collection using our powerful no-code tool. Creating collections is an enjoyable and thrilling process that enables you to showcase your unique digital assets. Now you can effortlessly create collections, allowing your customers to appreciate your one-of-a-kind creations and grow your web3 strategy.
Updated about 1 year ago