Setup Drops
How to drop a paid NFT collection
A paid NFT drop is a highly anticipated event within your community. It is a release of a collection of unique and valuable Non-Fungible Tokens (NFTs) that are made available for purchase by collectors and enthusiasts. The interest and buzz generated by these NFT drops can be attributed to the fact that they offer a limited-time opportunity to acquire digital assets that are often highly sought after.
Once your brand creates a collection in Mojito Admin, you will need to add listing items from that collection to your drop. Creating a collection and then adding it to a new drop allows you to control the structure of the drop, edit content before the drop goes live, perform quality control checks, and configure settings for different items within the same collection
Paid NFT sale types
In this guide, we will teach you how to set up various paid NFT drop types.
The different paid NFT drop options include:
- Buy Now is a sale type where NFTs are listed for a fixed price, and buyers have the option to purchase them instantly. It's similar to a traditional e-commerce model where you can add an item to your cart and proceed to checkout.
- Auctions involve the bidding process, where NFTs are put up for sale and buyers can place bids to compete for ownership. The auction usually has a specific duration, during which participants can increase or decrease their bids depending on the auction type implemented.
- Ballot Sales create a fair way for anyone to obtain highly desirable items. That is because instead of a first-come-first-serve or bidding process, participants enter their names into a random selection pool, and winners are chosen through a draw or algorithmic process.
Setting up a drop
Ready to drop your first paid NFT collection? Follow the steps below to get started.
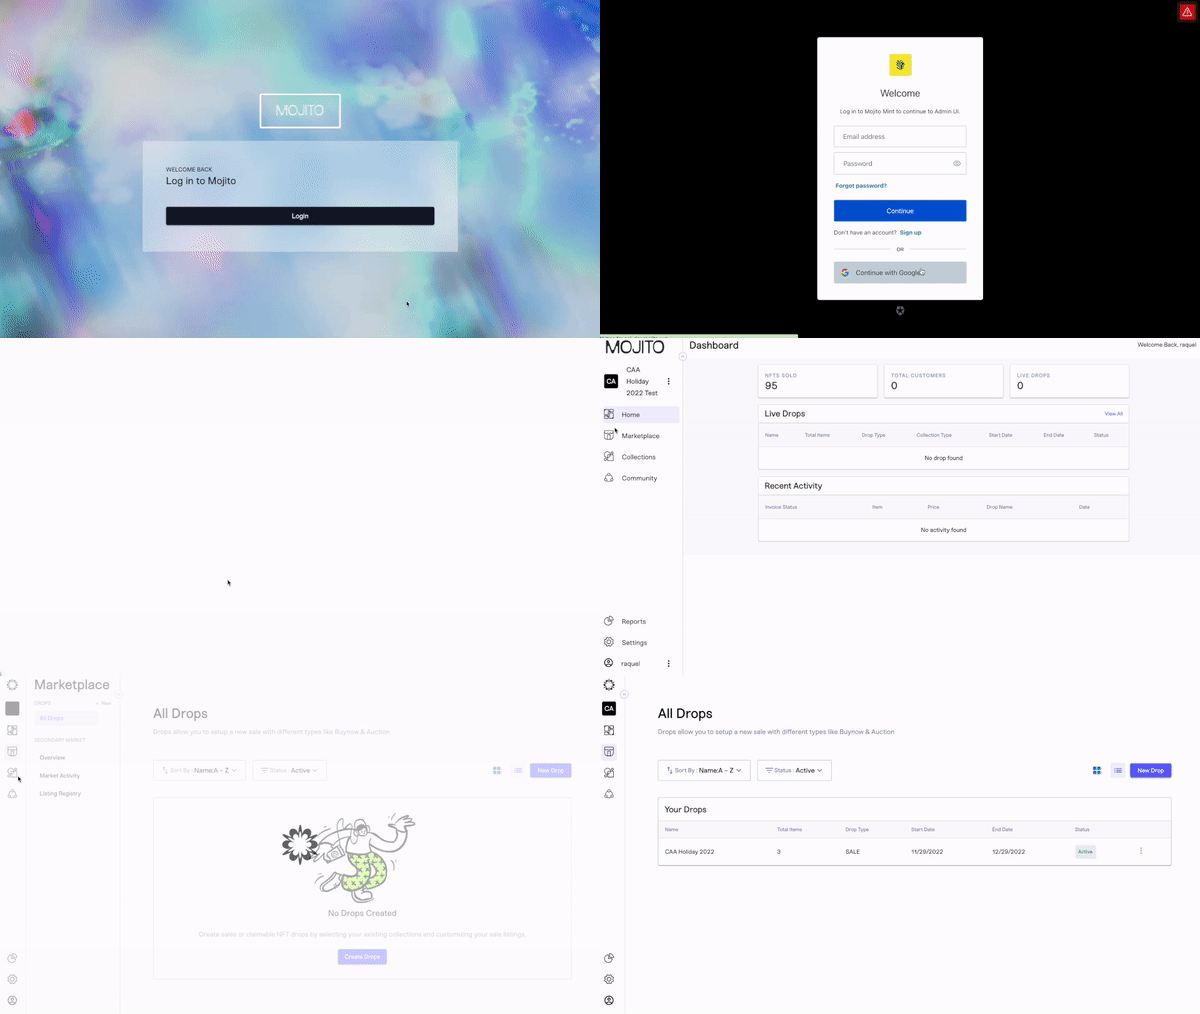
Step 1: Navigate to your marketplace
After logging into your organization's dashboard, navigate to the “Marketplace” tab. Here you can create new drops, manage or view draft and deployed drops and listings, and edit items in your drop.
Step 2: Create a New Drop
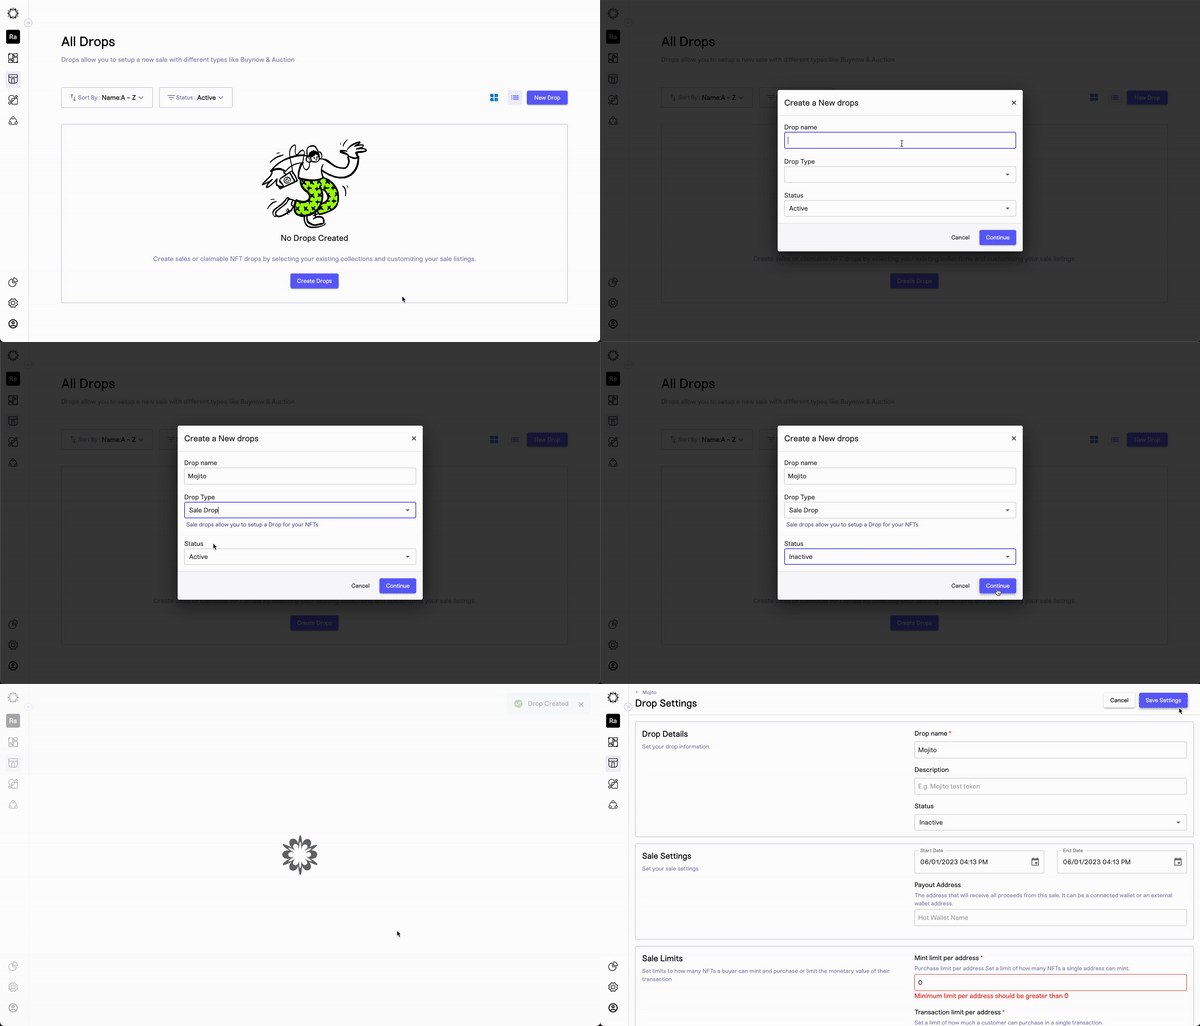
To create a drop, click "New Drop". A pop-up will appear asking you to name the drop, pick a sale type, and set its status.
Be sure to choose “Sale” for a paid NFT drop and set the status as inactive so you can work on your draft. Once you are satisfied with your inputs click “continue” to edit your drop details.
Step 3: Set Your Drop Settings
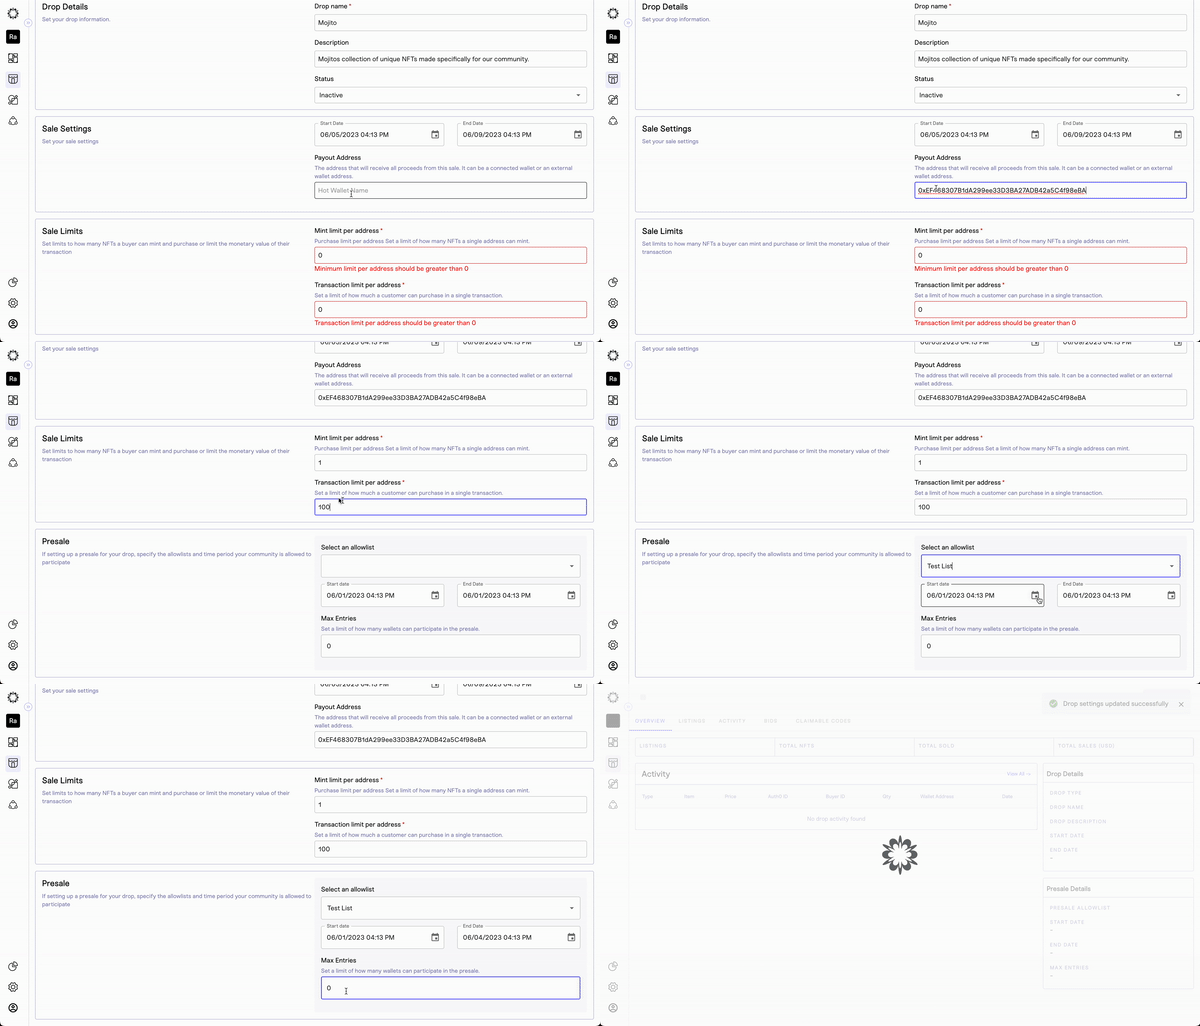
Your drop will be created as a draft and you will be taken to a new screen where your team can customize the settings. These settings include:
- Drop Details: create your customer-facing drop name, description, and sale status.
- Sale Settings: set the time period for the sale and payout address used to receive funds for items sold.
- Sale Limits: limit how many items a customer can mint and spend during your drop.
- Pre-Sale options: choose whether to enable a pre-sale time period and allowlist.
Once you have entered your desired settings, click "Save Settings". You will know that your settings have been successfully saved when you are redirected to the overview of your drop.
Step 4: Navigate to Listings and Add Items to Your Drop
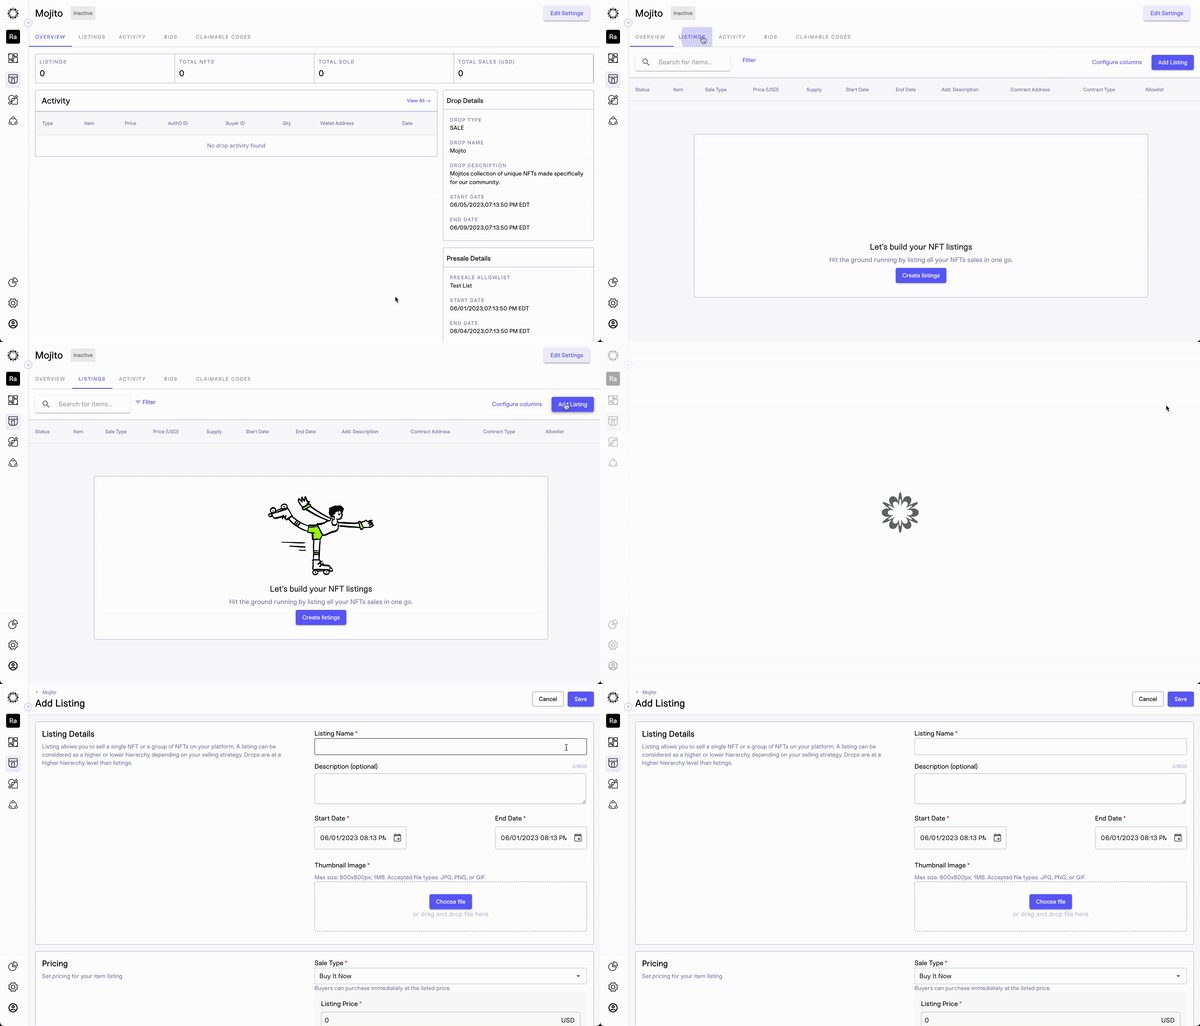
After creating your drop, you can add listing items using our no-code tool. With this step, your team can build a multi-tiered drop that can be a single auction, a single "Buy Now," or a combination of both.
To get started, click the “add listings” button and wait for the listing settings page to load.
Step 5: Add Listing and Edit Settings… and Repeat
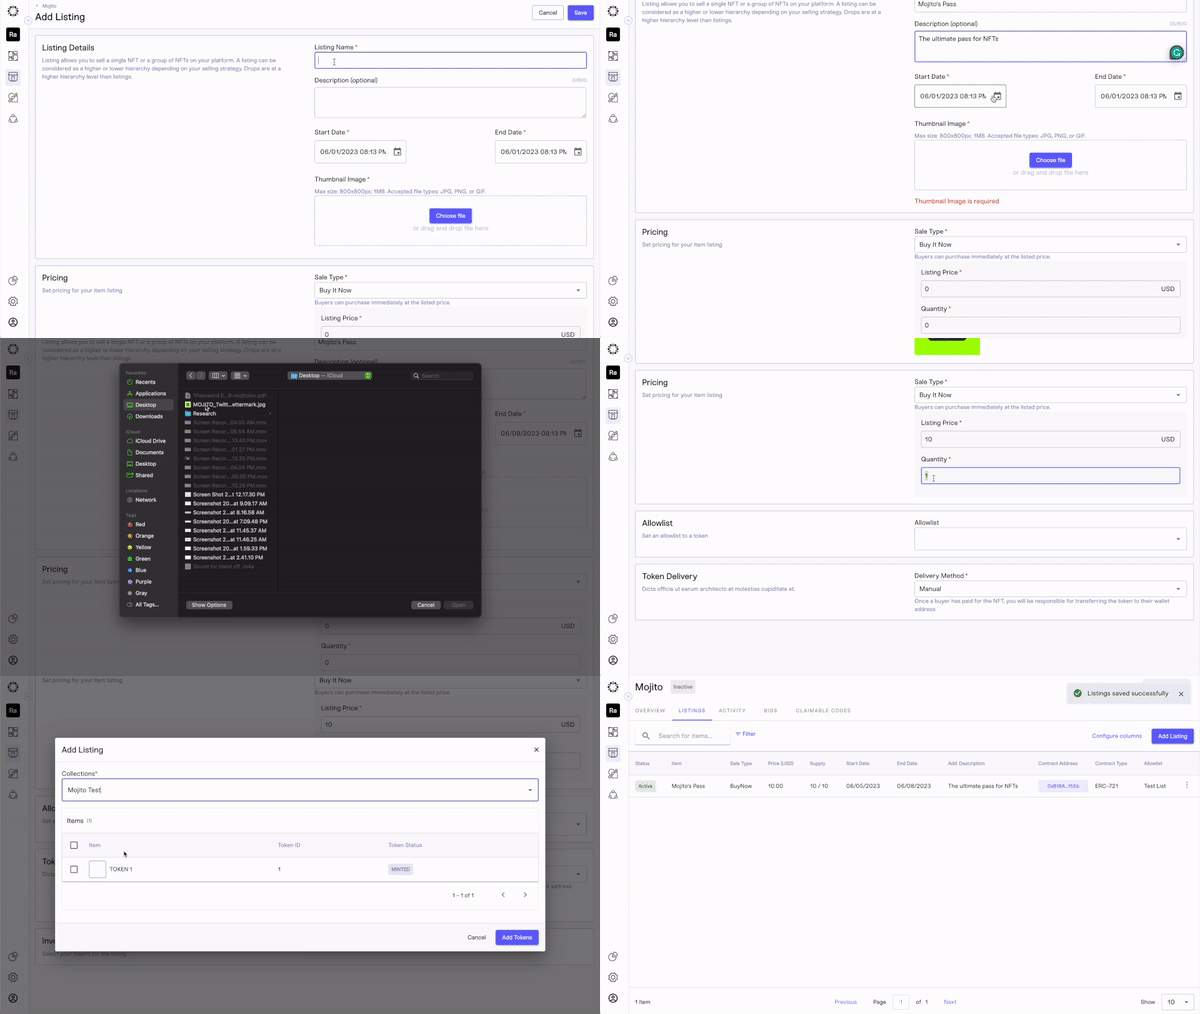
After the page loads, you can start entering the settings for each item you add to your drop. This lets you set different start and end times for each item, and choose between an auction, buy now, or both sale types, among other choices.
To add a listing item to your drop, you need to provide the following information:
-
Name, description, image, and sale start and end time.
-
Pricing details, including choosing between a buy-now or auction sale, starting bid or buy-now pricing, and other options depending on the type of sale you choose.
-
Decide whether to use an allowlist per listing.
-
Choose whether to deliver your tokens manually or automatically after the sale.
1.For the 'premint tokens' option, needs to select atleast one token in the collection .This can be done on the listing page 'inventory'.Simply select the 'premint collection' select one or multiple tokens and click on 'Add token'.
2.For the 'Mint on Demand' option, as there won't be any tokens in the collection, a minter needs to be assigned. This can be done on the listing page under 'Inventory'. Simply select the 'Mint on Demand' collection and click on 'Add Minter'.
Repeat step 5, depending on how many items you want to add to your drop.
Step 6: Review and Publish
It's essential to review your settings to ensure everything is correct and your drop is executed with no hiccups.
To review the drop, follow these steps:
- Review your listing details and token delivery settings to ensure they are correct.
- Review your overview and drop settings to ensure they are correct.
Once you are satisfied with your inputs, go to your drop settings and change your sale status to active. This will ensure your sale is executed according to your inputs and your community can purchase their favorite items.
Congratulations!
That's it! You've successfully created a drop for your collection using our no-code NFT tool. Our platform offers advanced customization options, including the ability to determine price, restrict audience availability, and define sale time parameters.
Keep in mind that the success of your drop depends on how well you market it, so consider promoting your drop on social media, email newsletters, and other channels to reach a wider audience.
Updated 8 months ago
